Back Into It
It's been about a month and a half since I set the project aside. I finished the new Zelda game (well, I completed the main story), my guild accomplished our goal of clearing the new WoW raid on "Heroic" difficulty (we only play together for 3 hours per week, so we don't push too heavily into the highest level of difficulty), and - most importantly - my dad is still alive. Honestly, I can't see him making it much longer, but I got to spend more time with him, and I'm glad he knows how much he means to me.
A lot has happened at work too, though I don't want to go into much detail here. I'll just say that my job responsibilities have increased immensely, but I didn't actually get any sort of formal promotion. I really only mention it because it could start eating into my free time.
So here I am, trying to switch my mental context back to this game. I'd be lying if I said I hadn't thought about it at all over the last 45-ish days, but most of my thoughts have been very negative:
- Building a roguelike is hard and time-consuming.
- Remote play-testing is difficult because I can't actually see the person playing.
- Remote play-testing an iOS app is even more difficult because I can't even see the game itself!
- Even if I do make a "fun" game, I have no clue what to do about artwork.
- The market is so saturated that there's very little chance of financial gain, which is a shame for a project that has taken so much time and effort.
These points are very real hindrances to my motivation. Don't get me wrong, I enjoy solving hard problems and overcoming obstacles, but it's difficult to press forward knowing that failure is a very likely outcome. However, we defined "success" way back in the introduction to contain two very achievable goals:
- Release the game on at least one platform.
- Release this book.
Neither of those goals make any claim of monetary gain. At the very least, it would be an impressive bullet point on my resume. Still, time is money, and this entire endeavor may simply turn out to be a means of marketing myself for future opportunities rather than providing any direct compensation.
Speaking of marketing - that's another aspect of releasing a video game that I have utterly ignored thus far. Obviously I don't have much to show, so it wouldn't make very much sense to go crazy with it, but while I'm thinking about it, let's examine the ecosystem a bit.
If you search for tips regarding releasing your own game, you're likely to stumble upon advice to post clips of your game all over social media - Reddit, Twitter, YouTube, etc. - with additional advice for how to go about posting to each one of them. Additionally, there are many posts on those very same platforms about posting to those platforms! Clearly, indie game development is a popular topic (which is just another indicator of a saturated market).
These platforms are interesting to me because they contain extraordinary amounts of valuable information (as well as even more worthless information). I've dabbled with the idea of creating yet another social network because I like the concept of information sharing. I recognize that I am an outlier in the type of content I choose to consume from these platforms: I enjoy long-winded programming lectures that go into a lot of detail (I have even linked to some throughout these chapters). The vast majority of content these days is very short - a meme on Reddit or a TikTok video only lasting a couple of seconds. That is the type of post that is expected when marketing a video game.
One type of marketing strategy that I enjoy seeing is through the development process itself. This generally takes the form of a development log ("devlog"), consisting of either a series of blog posts or a series of YouTube videos. Unfortunately, devlogs rarely contain in-depth technical details because the general audience doesn't actually care - they just want to see what new features have been added to the game. Posts that contain more technical details tend to be part of a tutorial series (almost as if the target audience consists of developers rather than gamers).
Releasing the Book
So where do I stand within all of this? I keep referring to this writing as a "book", but I've also been recording short clips of the game, which obviously can't translate into a printed format. While the actual content is very technical, it's clearly not a tutorial - I'm just writing things as I go, like I'm logging my development process. I think it's clear that my target audience consists of developers, but it's not clear to me why they would choose to read what I have to say. I could make a claim that my writing is more sincere to the actual development process, compared to a tutorial that has been curated to portray a process that delivers the best possible result.
The premise of writing this book at all was to provide an in-depth look at the development process so that I could retroactively pinpoint the failures that led up to the project's demise. On the off-chance that I were to actually succeed, then the book becomes a success story rather than a post-mortem.
Where am I going with this? Well, the value of a devlog as a marketing tool lies in its immediacy: the audience can keep track of the progress of a project as it's happening, and get more and more excited about the project as it gets closer to release. Marketing is all about awareness, visibility, and hype. If I were to release the book after the game were already released, then the game itself would be a marketing tool for the book instead! This isn't a bad strategy: Derek Yu released his book Spelunky, which talks about the development and design process of his game of the same name. However, in Spelunky's case, I doubt that writing a book was originally a goal at all.
So I'm going to publish this book. Not in the traditional sense - instead I'm going to generate a blog containing the chapters I've written. I've been using Markdown files inside of a Git repository to write and edit this book over time - this is the same way I would write documentation for a program, so it feels natural to me, freeing me up to actually write rather than spend any time dealing with software that I'm not necessarily familiar with. From here, I can simply move some files around and utilize MkDocs to generate web pages from the Markdown files that I've already written. Specifically, I'll use mkdocs-material, because I think it looks better. I can use GitHub Actions to compile the static files every time I push a change to the branch, and use GitHub Pages to publish the site to my own domain: https://log.kravick.dev ("Kravick" is the name of one of my World of Warcraft characters, which I've only recently adopted as a more general screen name).
Releasing the Game
I'd like to give the actual game the same treatment: automatically push the latest build of the game to the website so that anyone can play it and (hopefully) provide feedback. No need to go through a distribution platform like the App Store; no worrying about beta opt-in, bundle signing, or installing a sketchy app from some dude on the internet. My goal is for anyone to be able to play the game directly from their web browser, from the same web site that hosts the book.

All joking aside, that's a rather ambitious goal. Not only would it require compiling the application to WebAssembly, but it would require writing entirely new platform-specific implementations as well - all things I've never done for a browser before! Is it worth it?
Well, doing all of this work now would provide me with a reusable platform to test out any future game ideas I might have in a repeatable and easily distributable manner - just create a new Git repo! Honestly though, that's not the reason I would do this. I think the real reason is simply because I want to. With no promise of monetary gain, I don't feel locked into releasing on the App Store or any other distribution platform, but I retain the ability to release on them later.
13.1 Compiling to WebAssembly
Emscripten is a compiler toolchain that supports compiling to WebAssembly (Wasm, for short). Technically, Clang can compile to Wasm just fine, but Emscripten provides other bells and whistles, such as the ability to convert from OpenGL into WebGL. I haven't written an OpenGL-based renderer for the game yet, but that's the direction I'm planning on going with this. Ignoring most of the platform implementations for now, my initial goal is to get a barebones version of the application running within the browser, with the update() and fixedUpdate() FPS getting logged to the console.
Alfredo is my macOS app, Scampi is my iOS app, and Pesto will be my web app.
Creating the Subproject
I've created a new directory named pesto/ at the root of the project, and started by copying Alfredo's CMakeLists.txt. There is very little within this file that I actually need to keep - we're not using Objective-C, we're not worried about copying resources yet, the only library we actually need to link to right now is linguine. The most important thing to do is rename the references to alfredo to pesto instead.
Logically, the next thing to do is to whip up a main method so that we actually have something to execute. I copied that from Alfredo too, but there's a lot that needs to change before it can run: aside from the platform-specific classes that Pesto doesn't have access to, Alfredo also utilizes an NSApplicationDelegate (in Objective-C, no less). I'll just get rid of all of that and assume that we won't need anything similar in the browser (though I could very well be wrong about that). After that, one by one, I created stubs for all of the platform abstractions, cleaning up the dated base classes along the way, since I've converged on some consistent coding styles along my lengthy journey.
There are two somewhat important abstractions that I've actually bothered to implement at this point: the Logger and the TimeManager. I'm prefixing all of these abstractions with the word Web because I can't think of anything better. The WebLogger simply uses std::cout, similar to Alfredo's implementation. Alfredo's TimeManager, however, utilizes the clock_gettime_nsec_np that is specific to macOS, so I modified the currentTime() method to simply use std::chrono instead.
pesto/src/platform/WebTimeManager.cpp snippet
time_t linguine::pesto::WebTimeManager::currentTime() const {
  auto now = std::chrono::system_clock::now();
  return std::chrono::system_clock::to_time_t(now);
}
pesto/src/main.cpp
#include <Engine.h>

#include "platform/WebAudioManager.h"
#include "platform/WebInputManager.h"
#include "platform/WebLifecycleManager.h"
#include "platform/WebLogger.h"
#include "platform/WebRenderer.h"
#include "platform/WebTimeManager.h"

using namespace linguine;
using namespace linguine::pesto;

int main() {
  auto logger = std::make_shared<WebLogger>();
  auto audioManager = std::make_shared<WebAudioManager>();
  auto inputManager = std::make_shared<WebInputManager>();
  auto lifecycleManager = std::make_shared<WebLifecycleManager>();
  auto renderer = std::make_shared<WebRenderer>();
  auto timeManager = std::make_shared<WebTimeManager>();

  Engine engine = Engine(logger, audioManager, inputManager, lifecycleManager, renderer, timeManager);
  engine.run();

  return 0;
}
Now I just need to figure out how to compile this with Emscripten.
Configuring CMake
I installed Emscripten using Homebrew, which is technically unsupported, but they do mention it on their website. It took a little bit of Googling and fiddling around, but apparently the magic to getting things to work with CLion is to use the default "Toolchain" settings, and create a new CMake profile which uses this option (changing the version number as necessary):
-DCMAKE_TOOLCHAIN_FILE=/opt/homebrew/Cellar/emscripten/3.1.42/libexec/cmake/Modules/Platform/Emscripten.cmake
When I tried to configure a new "Toolchain" in CLion to use emcc and em++, CLion would spew errors about failing to compile a test program and refuse to import the project with that profile. Apparently the trick is to use the default toolchain (which bypasses the test project check, since it's using the default compiler, which should always succeed), and rely on the CMake toolchain configuration to override those binary paths.
Now I just need to modify my root CMakeLists.txt to conditionally compile Pesto. Again, after a little Googling, I found that you can simply check the EMSCRIPTEN CMake variable.
CMakeLists.txt snippet
if (APPLE)
    add_compile_definitions(GLM_FORCE_DEPTH_ZERO_TO_ONE)

    if (IOS)
        add_subdirectory(scampi)
    else()
        add_subdirectory(alfredo)
    endif()

    add_subdirectory("${AUDIO_DIR}/audioengine")
    add_subdirectory("${RENDERERS_DIR}/metal")
elseif (EMSCRIPTEN)
    add_subdirectory(pesto)
endif()
At this point, the application successfully compiles and generates pesto.js and pesto.wasm files!
Running the Application
How do I run this thing? I could write an HTML file that includes the generated pesto.js file, but default CORS rules are annoying to deal with. Apparently Emscripten has anticipated this for me, and provide a tool called emrun to launch a generated HTML file using a local web server. My build didn't generate an HTML file though.
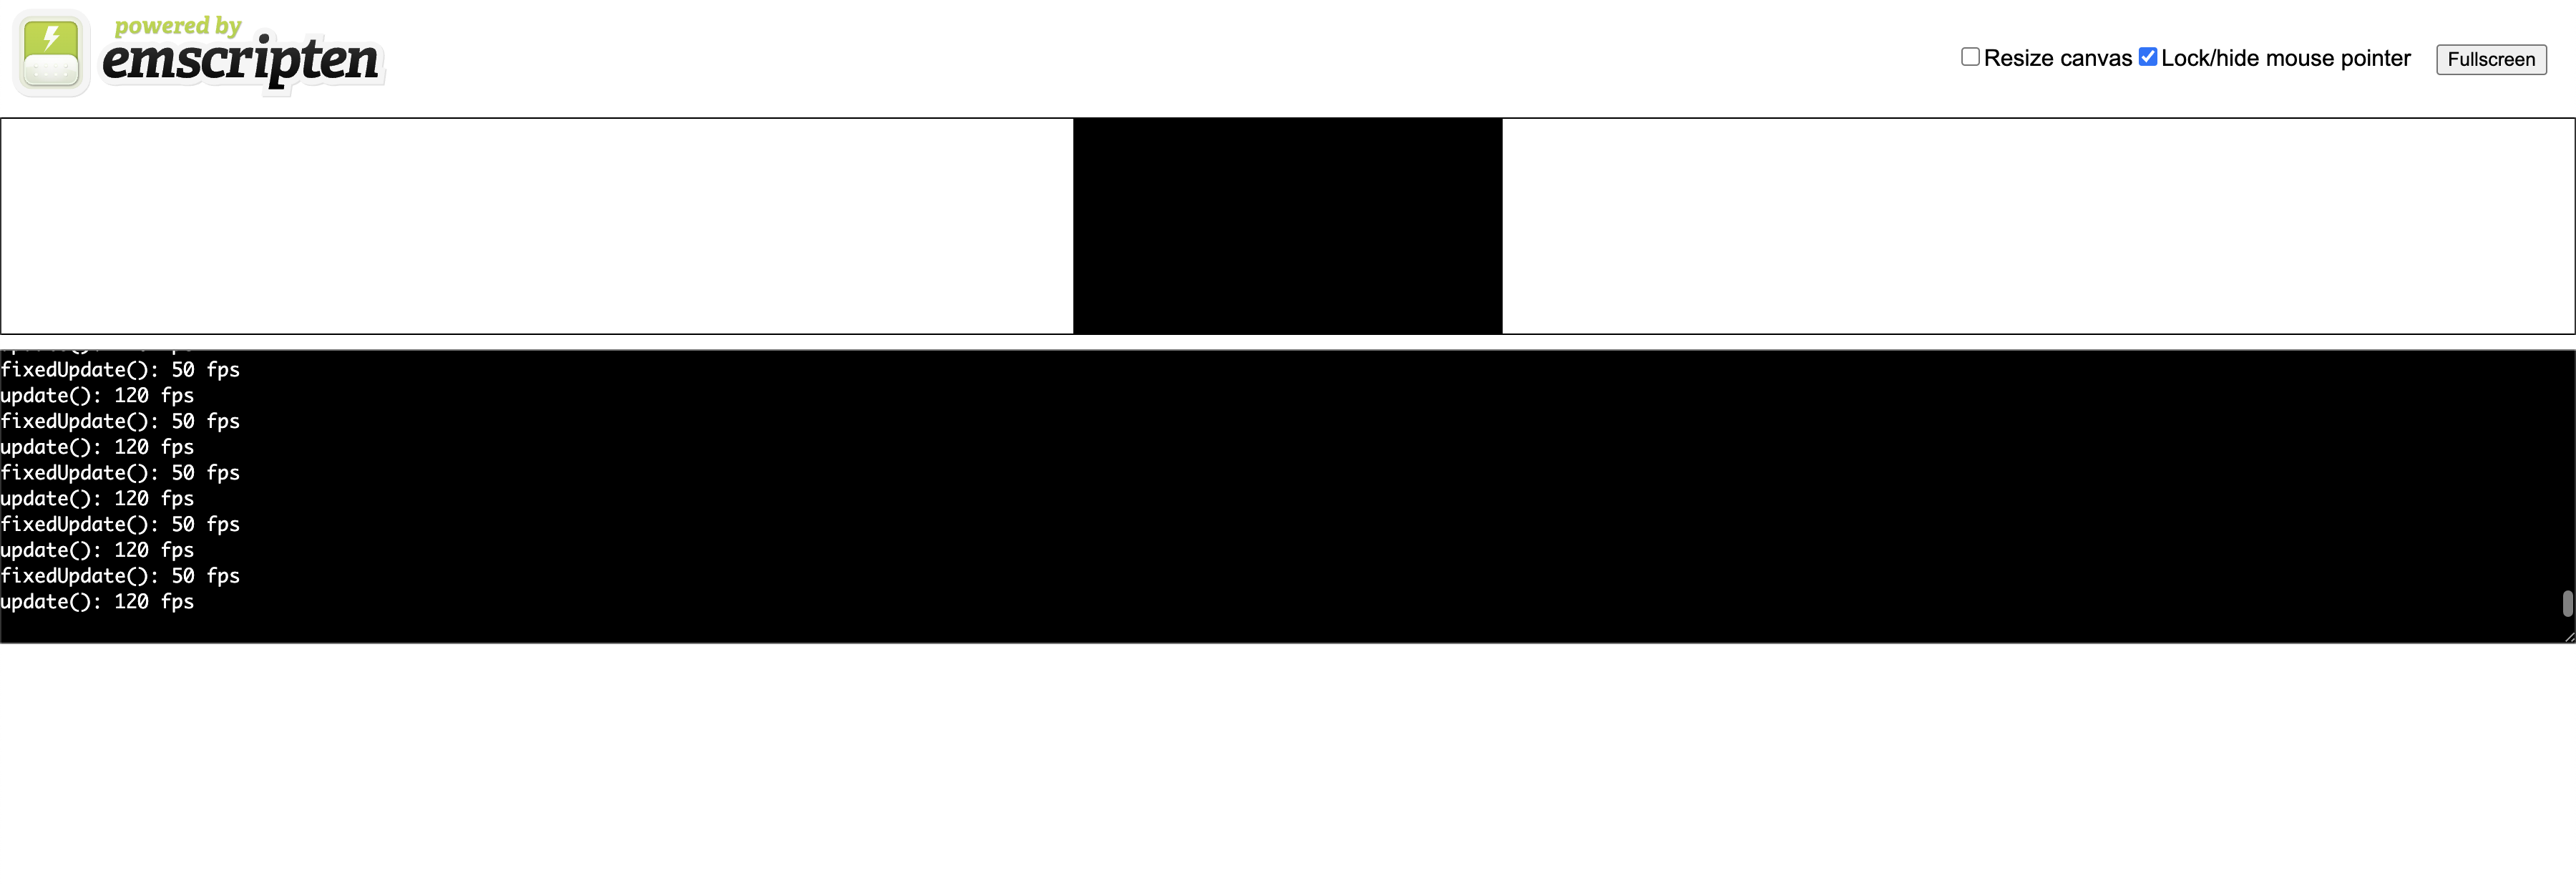
After another visit to Google, I found another magical CMake configuration to do just that: set(CMAKE_EXECUTABLE_SUFFIX ".html"). I added it to Pesto's CMakeLists.txt and rebuilt the application. Now I can just use emrun to open it up, and... well the web page did open, but it just shows a couple of empty black boxes.

This is why you always read the instructions. Emscripten has an entire section dedicated to the runtime environment, and a specific subsection about how to hook into the browser's main loop. It's almost as if they know how video games are written! /s
The key to this whole thing appears to be the emscripten_set_main_loop() function, which takes in a function pointer to a "tick" method - very similar to how our iOS app works. Good thing our engine already supports manually ticking! Unfortunately we can't pass in a reference to the engine itself, or any sort of delegate object - we must pass a function pointer, and according to C++ standards, we shouldn't attempt to get a function pointer to a specific object. Instead, we'll just construct our Engine outside of the main() method, create a tick() method, and invoke engine.tick() within that method. I hate it, but sometimes that's just what you have to do with C API's.
pesto/src/main.cpp
#include <emscripten/emscripten.h>

#include <Engine.h>

#include "platform/WebAudioManager.h"
#include "platform/WebInputManager.h"
#include "platform/WebLifecycleManager.h"
#include "platform/WebLogger.h"
#include "platform/WebRenderer.h"
#include "platform/WebTimeManager.h"

namespace linguine::pesto {

auto logger = std::make_shared<WebLogger>();
auto audioManager = std::make_shared<WebAudioManager>();
auto inputManager = std::make_shared<WebInputManager>();
auto lifecycleManager = std::make_shared<WebLifecycleManager>();
auto renderer = std::make_shared<WebRenderer>();
auto timeManager = std::make_shared<WebTimeManager>();

Engine engine = Engine(logger, audioManager, inputManager, lifecycleManager,
                       renderer, timeManager);

inline void tick() {
  engine.tick();
}

}  // namespace linguine::pesto

int main() {
  emscripten_set_main_loop(linguine::pesto::tick, 0, false);
  return 0;
}
While digging through the documentation, I also stumbled across this page for Logging Utilities. I'll go ahead and modify the WebLogger to utilize the emscripten_log() function instead.
pesto/src/platform/WebLogger.cpp
#include "WebLogger.h"

#include <emscripten/emscripten.h>

void linguine::pesto::WebLogger::log(const std::string& log) const {
  emscripten_log(EM_LOG_INFO, log.c_str());
}
However, even after doing all of that, the web app still doesn't seem to do anything. I'm going to resort to good old printf debugging for this. I added some logs before and after the call to emscripten_set_main_loop(), as well as within the tick() function. All of those appear to be working correctly. If I switch the printf() calls to use the engine's Logger, it continues to work, so that's a relief.
One step deeper, I'll add some logging to the Engine's tick() method - that also seems to work. Alright, how about the FpsSystem's update() method? That seems to work too! Why don't I see the logs reporting the frame rates?
Ah.
The FpsSystem accumulates deltaTime and fixedDeltaTime values and only logs when the accumulator reaches 1.0f. I bet I screwed up the WebTimeManager. Let's take another look.
And there it is.
I updated the currentTime() method to use std::chrono::system_clock::to_time_t, but neglected to update the durationInSeconds() method. On macOS, the clock_gettime_nsec_np() function explicitly works in nanoseconds, hence the division by 1 billion when converting to seconds. That was always a bad implementation on my part, since time_t typically deals with seconds, not nanoseconds (though the spec is more open-ended). In any case, I can fix Pesto's problem just by using the difftime() function, which explicitly returns the result in seconds.
pesto/src/platform/WebTimeManager.cpp snippet
float linguine::pesto::WebTimeManager::durationInSeconds(time_t from, time_t to) const {
  return difftime(to, from);
}
And there we have it - our engine is running and logging within a web browser!
13.2 OpenGL / WebGL Rendering
Long ago, I structured the project such that different renderers, powered by different rendering APIs, could simply be placed in the renderers/ directory of the project. Configuring a certain platform to utilize a specific renderer is then just a matter of changing the CMake configuration for that project in the root CMakeLists.txt.
This is a gross oversimplification, of course. Over time, we added more and more render features to our Metal renderer, and in order to support OpenGL, we'll have to re-implement all of those features. However, first and foremost, let's simply get the black box on the screen to be red instead. I've written a handful of OpenGL-based engines over the years. If memory serves me correct, it should be as simple as:
I'll go ahead and add a new opengl/ directory within renderers/, and move the currently stubbed WebRenderer.h into this new location. I'll rename it OpenGLRenderer.h, because OpenGlRenderer.h looks ugly. I'll create the matching .cpp file within the src/ directory, and implement the draw() method with the above snippet. Naturally, the code doesn't compile, because I haven't actually included the OpenGL headers yet. In fact, this new renderer isn't even a real CMake module yet, so I'll create its CMakeLists.txt.
Our Metal renderer utilized CMake's find_library function, but that doesn't seem to work with OpenGL on this system. After a quick Google, I changed it to find_package instead - of course there are multiple ways to achieve the same intent.
renderers/opengl/CMakeLists.txt
add_library(opengl
        src/OpenGLRenderer.cpp
)

target_include_directories(opengl PUBLIC include)
target_include_directories(opengl PRIVATE src)

target_link_libraries(opengl PRIVATE linguine)

find_package(OpenGL REQUIRED)
target_link_libraries(opengl PRIVATE ${OPENGL_LIBRARIES})
target_include_directories(opengl PUBLIC ${OPENGL_INCLUDE_DIR})
Reloading the CMake project appears to be successful, though I'm not entirely sure which header to include in our renderer in order for it to compile. I wonder where it's finding the OPENGL_INCLUDE_DIR - I'll add a log to the CMake configuration.
After reloading the CMake project again, it informs me that the include directory for OpenGL is located at /opt/homebrew/Cellar/emscripten/3.1.42/libexec/cache/sysroot/include, which is unexpected, but not entirely surprising. Emscripten claimed that it could automatically compile regular OpenGL code to Wasm, and it appears that it does so by using its own distribution of OpenGL.
Digging around within that directory, I see a few subdirectories that sound related to OpenGL: GL, GLES, GLES2, and GLES3. GL is likely related to the desktop distribution of OpenGL, while the GLES* directories are associated with OpenGL ES and its historical versions. OpenGL ES is intended for embedded and mobile systems, and WebGL is a browser-specific API that's based on the OpenGL ES API. More specifically, WebGL 1.0 is based on OpenGL ES 2.0, while WebGL 2.0 is based on OpenGL ES 3.0. Supporting the historical versions is likely necessary for existing projects to cleanly port to the browser, but since we're starting from scratch, we'll go ahead and target OpenGL ES 3.0 - er... WebGL 2.0.
CLion no longer complains about the undefined symbols in the OpenGLRenderer, but Pesto isn't happy because it no longer has a WebRenderer available to it. We just need to link to the newly created library:
CMakeLists.txt
pesto/CMakeLists.txt
Now we can change the renderer in our main.cpp file to OpenGLRenderer. The app compiles once again! However, when I attempt to run it, the Emscripten page informs me that an exception occurred, and to check the JavaScript console. Opening up the console, I am greeted with this error:
Uncaught TypeError: Cannot read properties of undefined (reading 'clearColor')
    at _glClearColor (pesto.js:1:45657)
    at pesto.wasm:0x14b8a
    at pesto.wasm:0x13c35
    at callUserCallback (pesto.js:1:23339)
    at Object.runIter (pesto.js:1:24633)
    at Browser_mainLoop_runner (pesto.js:1:40289)
It's not a particularly helpful error, but I believe I know the actual reason: OpenGL applications rely on creating a "context" of some sort, and I skipped that step entirely. Context creation and management differs between platforms, but once you get the context set up, the rest of the rendering logic is mostly the same between those same platforms. Let's find out how Emscripten wants us to create an OpenGL context.
I searched the Emscripten website for the word "context", which led me to some API documentation for a WebGL context, including functions like emscripten_webgl_create_context() and emscripten_webgl_make_context_current() - sounds good!
The emscripten_webgl_create_context() function requires a "target" string, which I guess is the ID of the HTML canvas element. In the autogenerated HTML file that Emscripten creates, the canvas element has an ID of "canvas", so I'll just go with that for now. The function also requires an EmscriptenWebGLContextAttributes struct, but Emscripten also provides a emscripten_webgl_init_context_attributes() function, which sets all of the values within the struct to be suitable for WebGL 1.0. I'm targeting WebGL 2.0, however, so I'll call this function to fill in all the defaults, and set the version parameters explicitly.
The documentation states that emscripten_webgl_create_context() will return a negative number if an error occurred, so I can just check for that and exit early if something went wrong. Let's give it a shot.
pesto/src/main.cpp snippet
int main() {
  auto& logger = linguine::pesto::engine.get<linguine::Logger>();

  EmscriptenWebGLContextAttributes attributes;
  emscripten_webgl_init_context_attributes(&attributes);

  attributes.majorVersion = 2;
  attributes.minorVersion = 0;

  auto contextHandle = emscripten_webgl_create_context("canvas", &attributes);

  if (contextHandle < 0) {
    logger.log("Error " + std::to_string(contextHandle) + " when creating WebGL context");
    return -1;
  }

  emscripten_webgl_make_context_current(contextHandle);

  emscripten_set_main_loop(linguine::pesto::tick, 0, false);
  return 0;
}
Truth be told, I accidentally used > instead of < in the conditional at first, which caused the app to log that there was an error even though the result was not negative. Luckily I logged the error so I could quickly identify my mistake!
After fixing that bug, I am now greeted with a little red box on the screen! This weird loose coupling is achieved because OpenGL's context is set and managed on the main thread of the application. Since we haven't implemented any sort of multithreading into our engine, there are no problems - the main() method sets the context for the rest of the application, and the renderer is free to issue OpenGL commands to that context. With a more complex application, you need to be sure the OpenGL commands are being called in the correct order. On the other hand, Metal, Vulkan, and other "modern" rendering API's alleviate this issue by exposing command buffers, which are recorded ahead of time and submitted only when they are meant to. It's not unlikely that an OpenGL application will emulate the idea of these command buffers, effectively implementing the command pattern. I hope I can avoid having to do so, but it's not such a big deal if we find ourselves stuck without it.
The last thing I'll do before I move on is respect the cameras' configured clear colors (say that ten times fast). This is just a matter of iterating over the cameras and clearing as required, similar to what we did in the MetalRenderer.
renderers/opengl/src/OpenGLRenderer.cpp snippet
void OpenGLRenderer::draw() {
for (const auto& camera : getCameras()) {
if (camera->clearColor) {
glClearColor(camera->clearColor->r, camera->clearColor->g, camera->clearColor->b, 1.0f);
glClear(GL_COLOR_BUFFER_BIT);
}
}
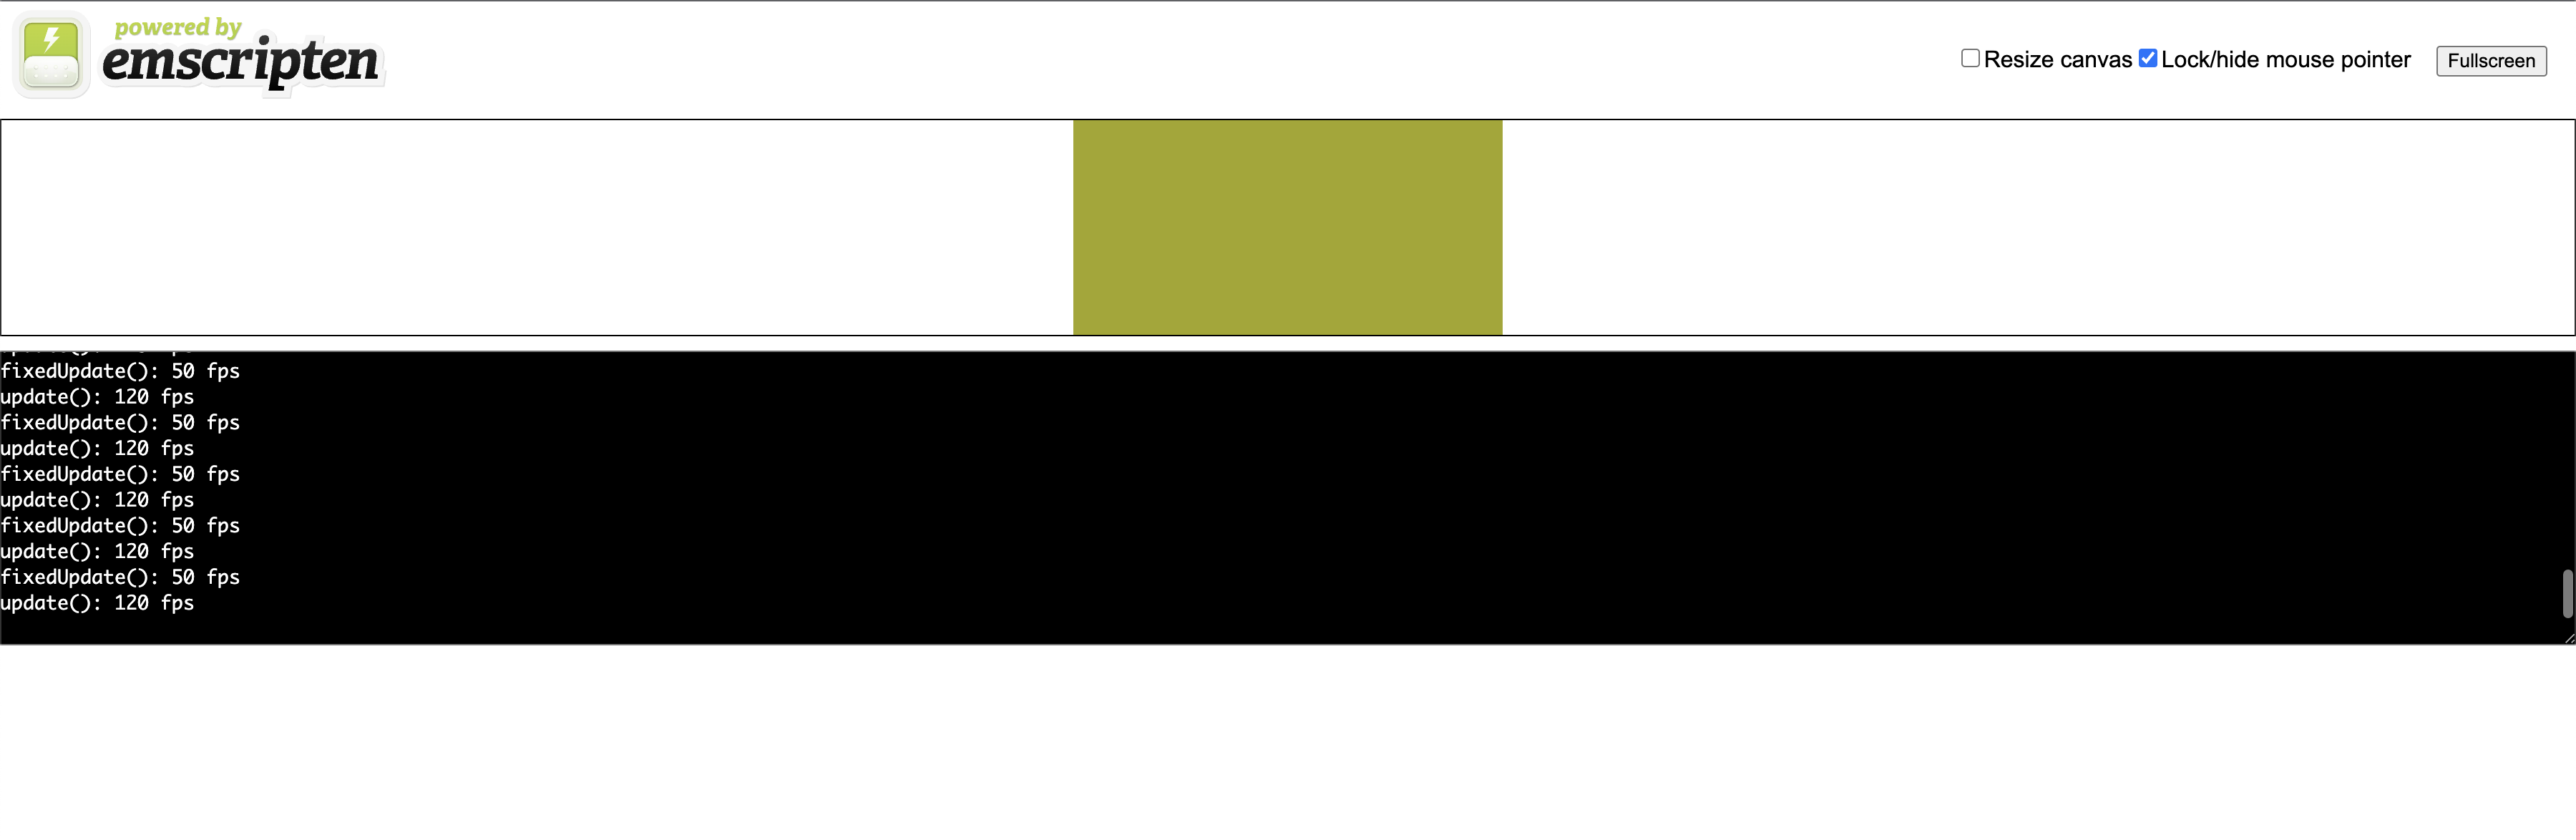
}
The resulting image is an ugly greenish-yellow - clearly different from the background color of Alfredo and Scampi. This is because the other apps use the sRGB color space, and OpenGL defaults to a linear color space. We'll configure this later as we configure our render passes, so I'll ignore it for now.
Feature Rendering
So far, we've only implemented three render features: "colored", for geometry that should be rendered to the screen as a single color; "progress", which uses shader math to dynamically fill the geometry with a single color and a black background; and "selectable", which renders the geometry using its entity ID to an offscreen texture, which can later be sampled to determine what entity is located at any given point on the screen.
Implementing the colored feature is enough to show the game world, so that's where we'll start. I created a stub ColoredFeatureRenderer within the opengl library, and added it to the protected _features vector within our new renderer's constructor. I also modified the draw() method to iterate over all of the features and call the draw() method of the feature using the current camera.
It's been a while since I dealt with OpenGL, so I'm shamelessly using this simple tutorial to help me remember all the functions that I'll need. Since my game utilizes a couple of different mesh types (namely, quads and triangles), I'll need to create those bindable meshes in a similar fashion to how I did in the Metal renderer. Since OpenGL is very context-sensitive, it's highly recommended to "unbind" buffers and other resources when you're done using them, so I've added an unbind() method to the otherwise very similar Mesh interface. The new TriangleMesh and QuadMesh classes are identical, other than their differing positions arrays. Additionally, I've copied over the concept of a MeshRegistry from the Metal counterpart renderer.
renderers/opengl/mesh/Mesh.h
#pragma once

namespace linguine::render {

class Mesh {
  public:
    virtual ~Mesh() = default;

    virtual void bind() = 0;

    virtual void unbind() = 0;

    virtual void draw() = 0;
};

}  // namespace linguine::render
renderers/opengl/mesh/TriangleMesh.cpp
#include "TriangleMesh.h"

namespace linguine::render {

TriangleMesh::TriangleMesh() {
  GLfloat positions[] = {
      -0.5f, -0.5f,
       0.0f,  0.5f,
       0.5f, -0.5f
  };

  glGenBuffers(1, &_vertexPositionsBuffer);
  glBindBuffer(GL_ARRAY_BUFFER, _vertexPositionsBuffer);
  glBufferData(GL_ARRAY_BUFFER, sizeof(positions), positions, GL_STATIC_DRAW);
}

TriangleMesh::~TriangleMesh() {
  glDeleteBuffers(1, &_vertexPositionsBuffer);
}

void TriangleMesh::bind() {
  glEnableVertexAttribArray(0);
  glBindBuffer(GL_ARRAY_BUFFER, _vertexPositionsBuffer);
  glVertexAttribPointer(0, 2, GL_FLOAT, GL_FALSE, 0, nullptr);
}

void TriangleMesh::unbind() {
  glDisableVertexAttribArray(0);
}

void TriangleMesh::draw() {
  glDrawArrays(GL_TRIANGLES, 0, 3);
}

}  // namespace linguine::render
The app won't compile because of a "gotcha" with how my C++ dependencies are organized. main.cpp includes OpenGLRenderer.h, which includes MeshRegistry.h, but MeshRegistry.h is not "publicly" accessible by Pesto. To resolve this, I used the same pattern I used with the Metal renderer, in which an internal OpenGLRendererImpl class has knowledge of the MeshRegistry, and the externally exposed OpenGLRenderer simply contains a static create() method, which returns an instance of OpenGLRendererImpl.
With that out of the way, I've copied over the relevant parts of the Metal version of the ColoredFeatureRenderer, which allows it to filter which Renderables are relevant to the feature renderer and the current camera. Next I'll need to whip up the actual shader for the feature renderer, but first, let's see what happens if we try to run the app - I expect it to "work", but nothing to be displayed yet.
It doesn't work, but the error looks awfully familiar:
pesto.js:1 Uncaught TypeError: Cannot read properties of undefined (reading 'createBuffer')
    at __glGenObject (pesto.js:1:51370)
    at _glGenBuffers (pesto.js:1:51565)
    at pesto.wasm:0x1569d
    at pesto.wasm:0x17d16
    at Module._main (pesto.js:1:53402)
    at callMain (pesto.js:1:53940)
    at doRun (pesto.js:1:54311)
    at pesto.js:1:54462
You see, the MeshRegistry creates instances of the meshes in its constructor. The MeshRegistry itself is constructed by the OpenGLRendererImpl's constructor. That means, in our main.cpp file, we're constructing the renderer (and therefore the MeshRegistry, and therefore the mesh buffers) before we've even created and bound the OpenGL context!
To work around the issue, I've created an init() method on the OpenGLRenderer, and moved construction of the MeshRegistry and feature renderers within that new method. In the main.cpp file, I've added the call to init() after the call to the emscripten_webgl_make_context_current() function. Now the app runs successfully, and nothing has changed about the ugly greenish-yellow color (as expected).
At this point, I need to modify the ColoredFeatureRenderer to compile its own shaders into a "program", and utilize that program on every call to the feature renderer's draw() method. I won't bore you with the details of the shader setup until the end of the section, but I will show you how the shaders themselves change over time.
The initial version of the vertex shader is very basic:
#version 300 es

layout(location = 0)
in vec4 inPosition;

out vec4 fragColor;

void main() {
  gl_Position = vec4(inPosition, 0.0, 1.0);
  fragColor = vec4(1.0, 0.0, 0.0, 1.0);
}
As is the fragment shader:
#version 300 es

precision mediump float;

in vec4 fragColor;

out vec4 outColor;

void main() {
  outColor = fragColor;
}
Notice that there are no matrices used to adjust the input vertices into different "spaces" - I expect the shapes to appear on the screen exactly as their vertices are defined in their Mesh subclasses. Also notice that I've hard-coded the fragColor to red.
Unfortunately, the application doesn't even work yet because of this error:
After digging through the documentation, I found that you have to explicitly tell Emscripten to use WebGL 2.0 (which is based on the OpenGL ES 3.0 API). Unfortunately it's not enough to simply set the WebGL version in the context options, which is a shame.
pesto/CMakeLists.txt
I've also noticed that occasionally (including now), when I try to load the web page, it immediately gives an abort(OOM) error (OOM stands for "out of memory"), and I have to reload the page, which usually works. Apparently I can add the -sALLOW_MEMORY_GROWTH flag to allow more dynamic memory allocation, which I believe I will need with a game like this. Alternatively, I can configure the application to preallocate a chunk of memory, which is enough to keep the game stable. I'll just use the growth strategy for now.
The app once again runs without any errors, but the behavior is strange. I would expect there to be a red quad centered within the canvas - the triangles would be centered at the same position as the quads, and would therefore be indistinguishable. Instead, I usually only see the regular ugly background color, and I occasionally (briefly) see a right-triangle with its bottom-left corner toward the bottom-left of the screen. It seems as if the winding-order of the meshes are not ordered correctly. The default winding-order for OpenGL is counter-clockwise, so let's take a look at our Mesh positions.
Sure enough, the positions were defined in a clockwise order, so I rearranged them, since we have the luxury of using separate mesh definitions between our different renderers. Unfortunately though, that did not fix the issue. Apparently OpenGL doesn't even enable face-culling by default, so the face that was considered the "front" didn't even matter. In any case, it's good to have it be "correct", and I've explicitly set the intended "front" and culling options in the renderer's init() method.
renderers/opengl/src/OpenGLRenderer.cpp snippet
Come to find out, the issue where only one triangle of the quad was rendering correctly came down to a copy/paste error. When I copied the TriangleMesh to QuadMesh, I neglected to update this little line in the draw() method:
The 3 represents how many vertices should be drawn from the currently bound vertex buffer. I've updated that value to 6, since our quad is made up of two triangles.
The rendering is still intermittent, but it is at least displaying the full quad. I added a log into the ColoredFeatureRenderer's draw() method to help me figure out what's going on:
The results are interesting. When there is nothing being rendered, I don't see the log at all. As soon as the shape is displayed on the screen, I see a ton of logs indicating Size: 1. Apparently I'm filtering everything out! I moved the log to the beginning of the method, and instead checked the size of the getRenderables() method instead - I'm not over-filtering, there just aren't that many ColoredFeature renderables, as far as this class is aware. I know this can't be accurate, because our ProceduralPrototypeScene has many ColoredFeature renderables:
- The player
- The HUD background
- Every room tile
- The target reticle
- Every enemy
- Every projectile
I've pondered a bit about the situation, and I've come to the conclusion that none of the renderables that were created by the scene were registered with the feature renderer because the renderer wasn't initialized yet! The scene composes all of its entities in its constructor, and the instance of the scene is constructed by the Engine's constructor, which is constructed statically in main.cpp, before the main() method is invoked. The quads that are intermittently displayed are actually the dynamically spawned projectiles that are being fired at the player!
Rather than attempt to construct the renderer and engine up front, and "initialize" them later with a separate method, I'll just lazily construct them within the main() method, after the OpenGL context is ready.
pesto/src/main.cpp
#include <emscripten/emscripten.h>
#include <emscripten/html5.h>

#include <Engine.h>
#include <OpenGLRenderer.h>

#include "platform/WebAudioManager.h"
#include "platform/WebInputManager.h"
#include "platform/WebLifecycleManager.h"
#include "platform/WebLogger.h"
#include "platform/WebTimeManager.h"

using namespace linguine;
using namespace linguine::pesto;
using namespace linguine::render;

std::unique_ptr<Engine> engine;

inline void tick() {
  engine->tick();
}

int main() {
  auto logger = std::make_shared<WebLogger>();
  auto audioManager = std::make_shared<WebAudioManager>();
  auto inputManager = std::make_shared<WebInputManager>();
  auto lifecycleManager = std::make_shared<WebLifecycleManager>();
  auto timeManager = std::make_shared<WebTimeManager>();

  EmscriptenWebGLContextAttributes attributes;
  emscripten_webgl_init_context_attributes(&attributes);

  attributes.majorVersion = 2;
  attributes.minorVersion = 0;

  auto contextHandle = emscripten_webgl_create_context("canvas", &attributes);

  if (contextHandle < 0) {
    logger->log("Error " + std::to_string(contextHandle) + " when creating WebGL context");
    return -1;
  }

  emscripten_webgl_make_context_current(contextHandle);

  auto renderer = std::shared_ptr<OpenGLRenderer>(OpenGLRenderer::create());

  engine = std::make_unique<Engine>(logger, audioManager, inputManager,
                                    lifecycleManager, renderer, timeManager);

  emscripten_set_main_loop(tick, 0, false);
  return 0;
}
Finally, it works as I expect! Now I can add support for the transformation matrices. Utilizing uniforms in OpenGL is much less tedious than it is in "modern" API's, simply because you don't have to manage the uniform buffers manually - you simply call one of the various glUniform* functions when you need it. This is easy, but less ideal for uniforms that don't need to be updated frequently.
Here's the updated vertex shader:
#version 300 es

layout(location = 0)
in vec2 inPosition;

uniform mat4 viewProjectionMatrix;
uniform mat4 modelMatrix;

void main() {
  gl_Position = viewProjectionMatrix * modelMatrix * vec4(inPosition, 0.0, 1.0);
}
And the fragment shader:
#version 300 es

precision mediump float;

uniform vec4 color;

out vec4 outColor;

void main() {
  outColor = color;
}
Within the draw() method of the feature renderer, I'll use glUniformMatrix4fv() to update the viewProjectionMatrix and modelMatrix uniforms, and glUniform4fv() to update the color. Upon making those changes, the scene is once again completely empty, other than the greenish-yellow background.
After giving it some thought, remembered that I never actually call resize() on the renderer, which is responsible for resizing the Viewport, which the CameraSystem uses to determine the aspect ratio used to calculate the projection matrix. Back in Emscripten's documentation, I came across the emscripten_set_canvas_element_size() function, which I'll set to 1024x768 (a common screen resolution for old monitors with a 4:3 aspect ratio). I'll pass those same dimensions to the renderer's resize() method.
I can finally see the scene, except everything is black for some reason. This issue actually took me quite some time to diagnose, and I feel like an idiot for spending so much time on it. The color uniform is a vec4, but the color component of the ColoredFeature is a vec3, so the alpha component was being set to some unknown value in memory (usually zero, since everything was black). I've updated the shader to pass in a vec3, and always set the alpha component to 1.0. I've also updated the draw() method to use glUniform3fv() instead.
#version 300 es

precision mediump float;

uniform vec3 color;

out vec4 outColor;

void main() {
  outColor = vec4(color, 1.0);
}
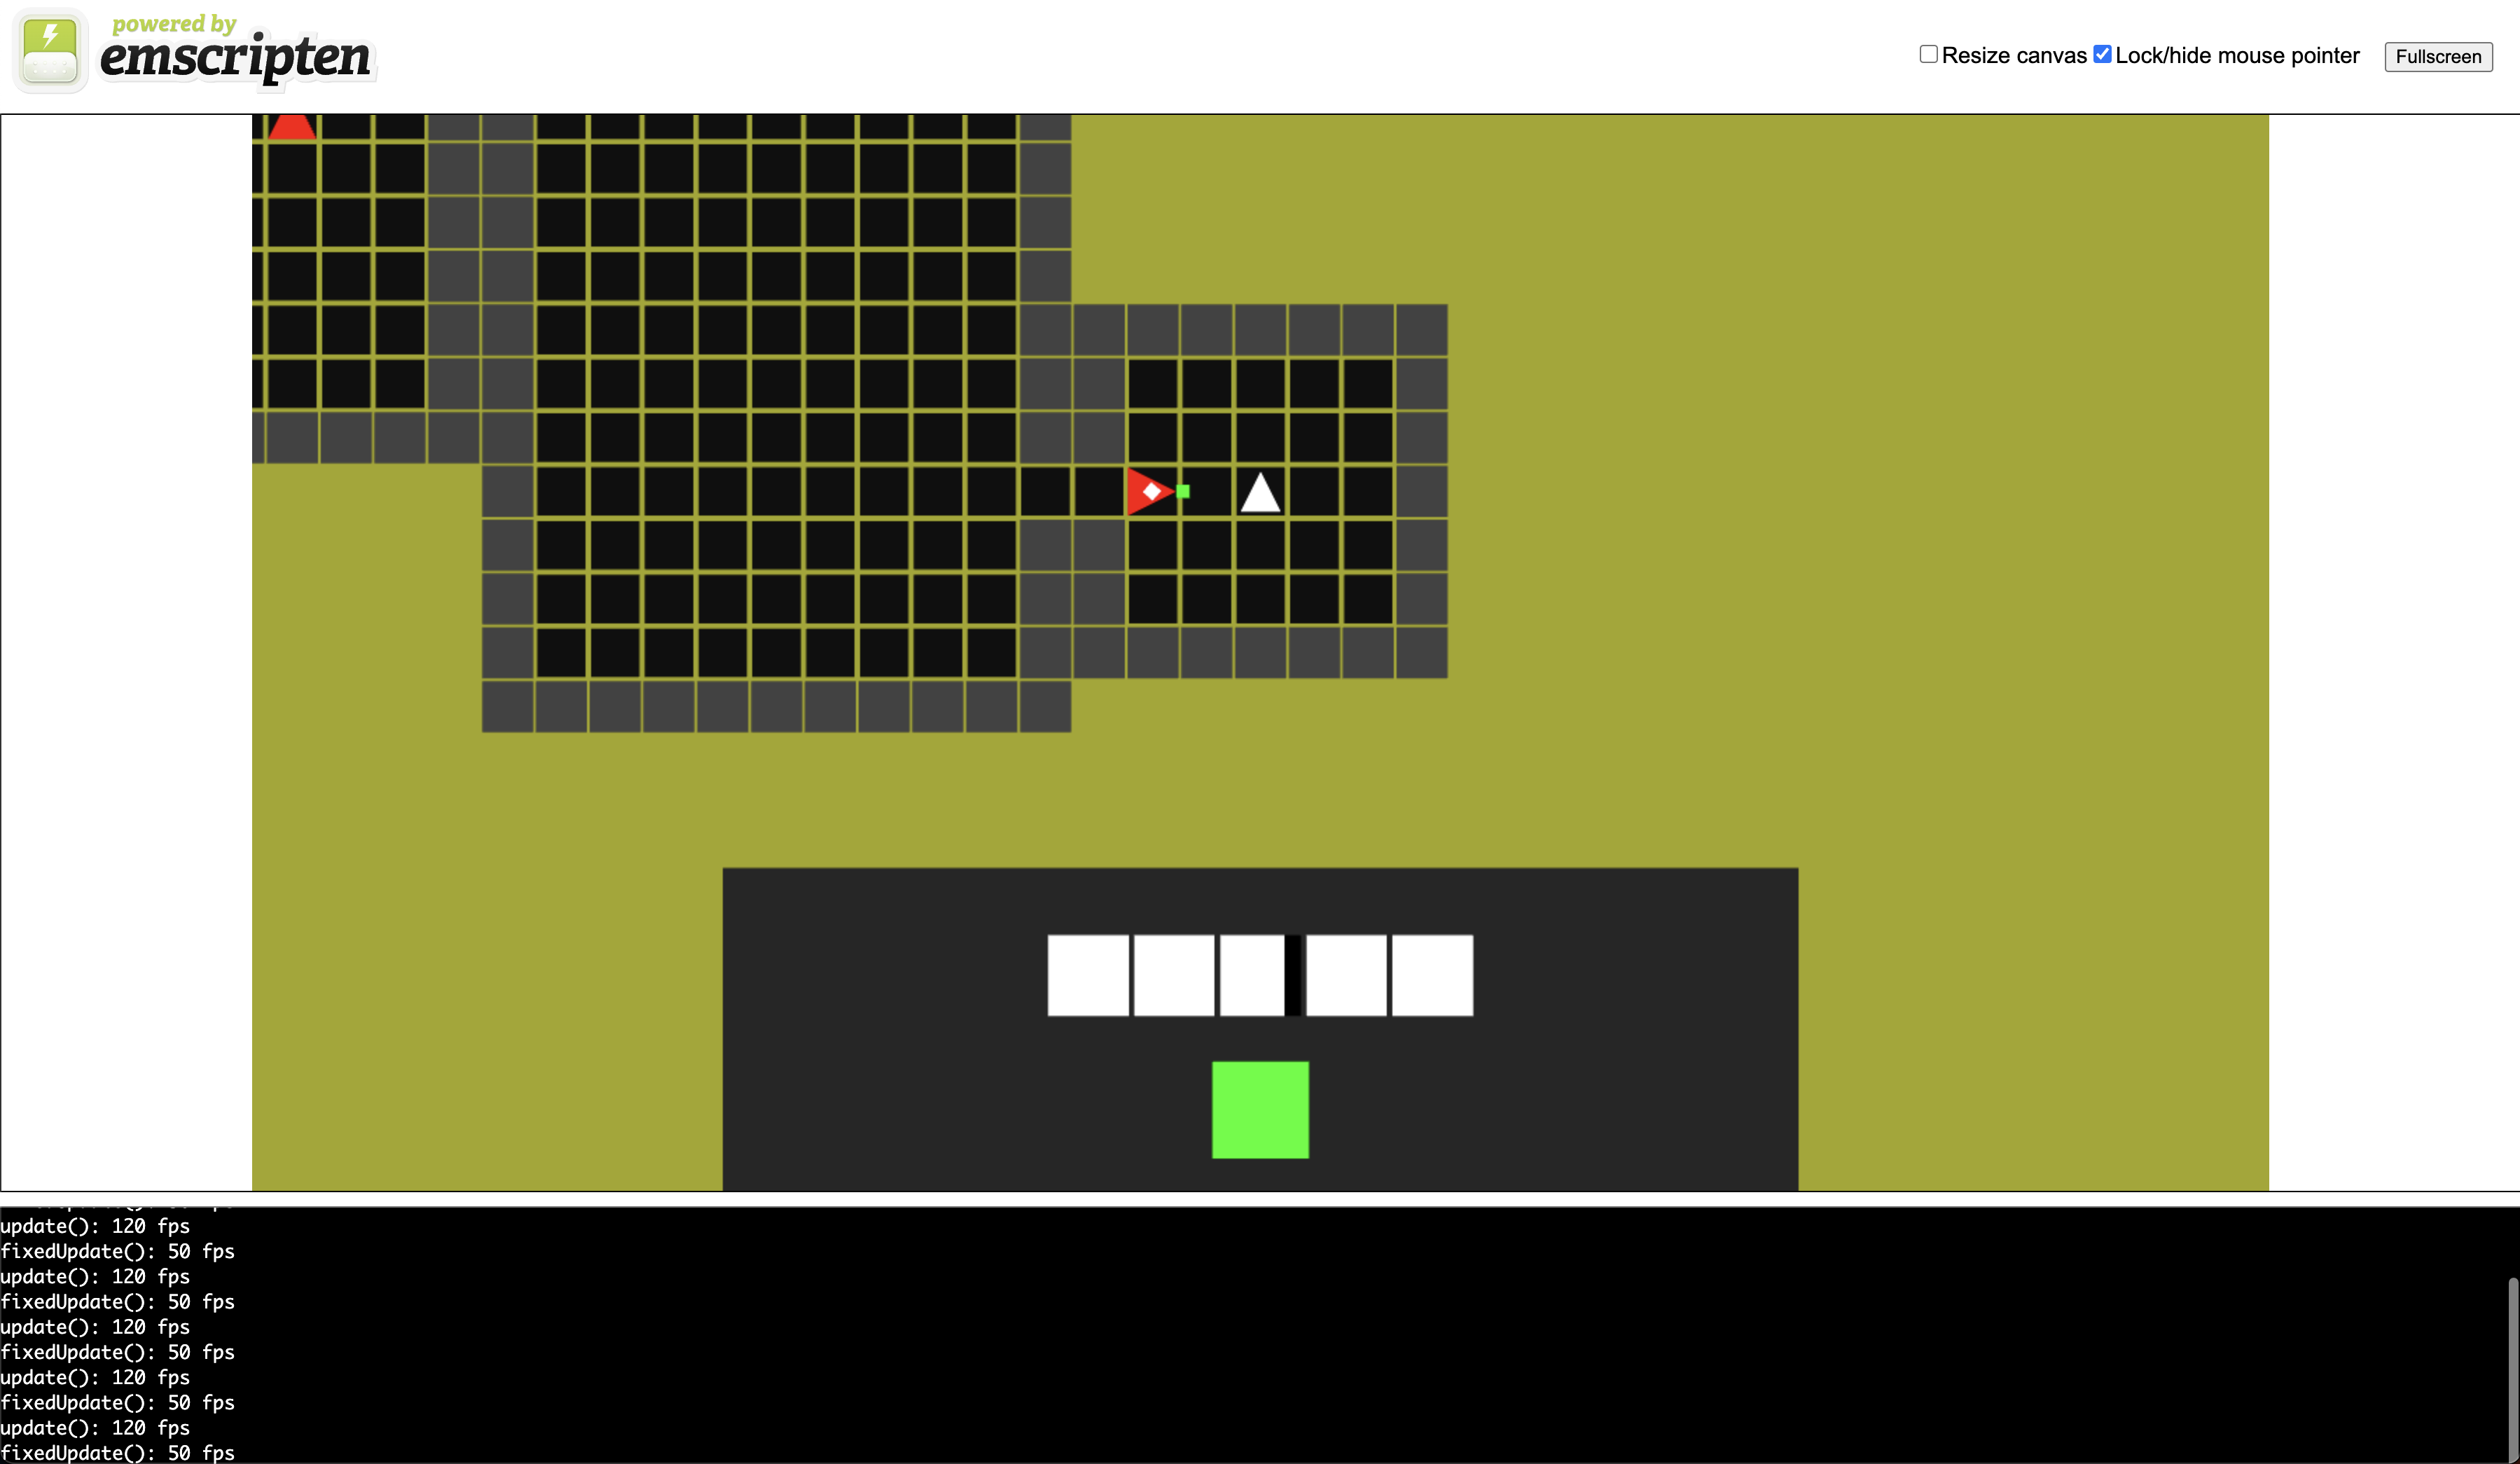
Now everything is using the correct color (other than the whole color space thing), but there are obviously some depth errors going on. I never actually enabled depth testing, so I'll just go ahead and do that.
renderers/opengl/src/OpenGLRenderer.cpp snippet
In the renderer's draw() method, I also need to call glClear() with GL_DEPTH_BUFFER_BIT.

That's more like it. Unfortunately, even though the console logs report that the engine is ticking at the expected rate of ~120 frames per second, the actual HTML canvas is only being updated about once per second.
I've spent a lot of time trying to figure out what I've done wrong, and I'm at my wit's end. At first I thought the canvas was being updated by the logs that I was printing out (which also happen to be once per second), but I've disabled the logs entirely and still experience the same behavior. It behaves the same way in Google Chrome, Firefox, and Safari. Google Chrome's profiler shows no significant lag between loop iterations. I've resorted to asking the Emscripten Discord channel about the problem - I really hope it's something trivial that I've missed.

Well, unfortunately no one in Discord was able (or willing) to help me debug the issue. I went down several debugging ventures attempting to discover the issue, including (but not limited to):
- Browser debugging using Chrome's Wasm debugger
- Converting Alfredo to use GLES 3.0 instead of Metal (spoiler alert, it didn't work)
- Running the old
TestSceneto make sure there weren't any locking bugs with theProceduralPrototypeScenesystems - Making sure other WebGL 2.0 websites worked on my computer, in order to rule out machine-specific issues
- Installing the Emscripten SDK on my Windows machine and compiling/running the app on a different system, to rule out any system-specific compilation issues (it wouldn't be the first time that has happened to me)
- Silver lining: I can totally develop the app on non-Apple machines now!
- Writing an entirely separate app, utilizing the same OpenGL calls, in order to rule out bugs in the Linguine engine
Ultimately, the bug was one of the first pieces of code I wrote in this chapter:
time_t linguine::pesto::WebTimeManager::currentTime() const {
  auto now = std::chrono::system_clock::now();
  return std::chrono::system_clock::to_time_t(now);
}
I even specifically called it out, and just didn't even thing about it being a problem:
...
time_ttypically deals with seconds...
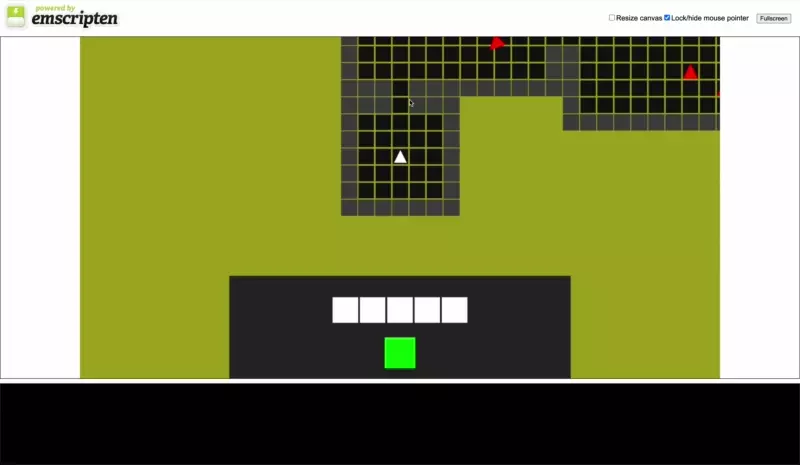
This isn't even the first time-related bug I've had in this chapter! Yikes. Because the result of currentTime() was measured in seconds, the Engine could only do arithmetic on one-second intervals, causing the deltaTime to always be either 0.0f or 1.0f. The renderer was always running at full speed, and most importantly, it was correctly rendering the current state of the world at any given time! The objects within the world were just jumping between positions in whole-second intervals, rather than the very small sub-second time integrations that we're accustomed to. I feel like an absolute idiot.
Emscripten has an emscripten_get_now() function that returns a double representing milliseconds. I'll utilize that instead, and multiply the result by one million so that I'm working with a whole number of nanoseconds. I'll also revert the durationInSeconds() method to divide by one billion, since I am once again dealing with nanoseconds.
pesto/src/platform/WebTimeManager.cpp
#include "WebTimeManager.h"

#include <emscripten/emscripten.h>

namespace linguine::pesto {

time_t WebTimeManager::currentTime() const {
  return static_cast<time_t>(emscripten_get_now() * 1'000'000.0f);
}

float WebTimeManager::durationInSeconds(time_t from, time_t to) const {
  return static_cast<float>(to - from) / 1'000'000'000.0f;
}

}  // namespace linguine::pesto
There are a couple of random changes that I made throughout this process that I'll commit. The WebLogger had a templated log() method that wasn't specialized for anything, so I'll just remove it. I apparently never added a virtual destructor to the Engine class after modifying it to inherit from the ServiceLocator interface. I also had to make some tweaks to the TestScene to get it to work, since it's been entirely neglected since we started prototyping. I'll also change the fragment shader to use highp precision, and set the canvas width to 1440, because I think it looks better on a website. Lastly, I'll remove some debug logging from the feature renderer. With all of that out of the way, here is the final ColoredFeatureRenderer:
renderers/opengl/src/features/ColoredFeatureRenderer.cpp
#include "ColoredFeatureRenderer.h"

#include <string>

#include <glm/gtc/type_ptr.hpp>

#include <renderer/features/ColoredFeature.h>

namespace linguine::render {

ColoredFeatureRenderer::ColoredFeatureRenderer(MeshRegistry &meshRegistry)
    : _meshRegistry(meshRegistry) {
  auto result = GL_FALSE;

  auto vertexShaderId = glCreateShader(GL_VERTEX_SHADER);

  {
    auto vertexShaderCode =
        R"(#version 300 es

           layout(location = 0)
           in vec2 inPosition;

           uniform mat4 viewProjectionMatrix;
           uniform mat4 modelMatrix;

           void main() {
             gl_Position = viewProjectionMatrix * modelMatrix * vec4(inPosition, 0.0, 1.0);
           }
        )";

    glShaderSource(vertexShaderId, 1, &vertexShaderCode, NULL);
    glCompileShader(vertexShaderId);

    glGetShaderiv(vertexShaderId, GL_COMPILE_STATUS, &result);

    if (!result) {
      auto logLength = 0;
      glGetShaderiv(vertexShaderId, GL_INFO_LOG_LENGTH, &logLength);

      auto error = std::string();
      error.reserve(logLength + 1);

      glGetShaderInfoLog(vertexShaderId, logLength, NULL, error.data());

      printf("Vertex shader error: %s\n", error.c_str());
      throw std::runtime_error(error);
    }
  }

  auto fragmentShaderId = glCreateShader(GL_FRAGMENT_SHADER);

  {
    auto fragmentShaderCode =
        R"(#version 300 es

           precision highp float;

           uniform vec3 color;

           out vec4 outColor;

           void main() {
             outColor = vec4(color, 1.0);
           }
        )";

    glShaderSource(fragmentShaderId, 1, &fragmentShaderCode, NULL);
    glCompileShader(fragmentShaderId);

    glGetShaderiv(fragmentShaderId, GL_COMPILE_STATUS, &result);

    if (!result) {
      auto logLength = 0;
      glGetShaderiv(fragmentShaderId, GL_INFO_LOG_LENGTH, &logLength);

      auto error = std::string();
      error.reserve(logLength + 1);

      glGetShaderInfoLog(vertexShaderId, logLength, NULL, error.data());

      printf("Fragment shader error: %s\n", error.c_str());
      throw std::runtime_error(error);
    }
  }

  _shaderProgram = glCreateProgram();
  glAttachShader(_shaderProgram, vertexShaderId);
  glAttachShader(_shaderProgram, fragmentShaderId);
  glLinkProgram(_shaderProgram);

  glGetProgramiv(_shaderProgram, GL_LINK_STATUS, &result);

  if (!result) {
    auto logLength = 0;
    glGetProgramiv(_shaderProgram, GL_INFO_LOG_LENGTH, &logLength);

    auto error = std::string();
    error.reserve(logLength + 1);

    glGetProgramInfoLog(_shaderProgram, logLength, NULL, error.data());

    printf("Program error: %s\n", error.c_str());
    throw std::runtime_error(error);
  }

  glDetachShader(_shaderProgram, vertexShaderId);
  glDetachShader(_shaderProgram, fragmentShaderId);

  glDeleteShader(vertexShaderId);
  glDeleteShader(fragmentShaderId);

  _viewProjectionMatrixLocation = glGetUniformLocation(_shaderProgram, "viewProjectionMatrix");
  _modelMatrixLocation = glGetUniformLocation(_shaderProgram, "modelMatrix");
  _colorLocation = glGetUniformLocation(_shaderProgram, "color");
}

ColoredFeatureRenderer::~ColoredFeatureRenderer() {
  glDeleteProgram(_shaderProgram);
}

bool ColoredFeatureRenderer::isRelevant(Renderable& renderable) {
  return renderable.hasFeature<ColoredFeature>();
}

void ColoredFeatureRenderer::draw(Camera& camera) {
  glUseProgram(_shaderProgram);

  glUniformMatrix4fv(_viewProjectionMatrixLocation, 1, GL_FALSE, glm::value_ptr(camera.viewProjectionMatrix));

  auto filteredRenderables = std::vector<Renderable*>();

  for (const auto& renderable : getRenderables()) {
    if (renderable.second->getLayer() == camera.layer && renderable.second->isEnabled()) {
      filteredRenderables.push_back(renderable.second);
    }
  }

  for (const auto& renderable : filteredRenderables) {
    auto& feature = renderable->getFeature<ColoredFeature>();

    glUniformMatrix4fv(_modelMatrixLocation, 1, GL_FALSE, glm::value_ptr(feature.modelMatrix));
    glUniform3fv(_colorLocation, 1, glm::value_ptr(feature.color));

    auto& mesh = _meshRegistry.get(feature.meshType);
    mesh->bind();

    mesh->draw();

    mesh->unbind();
  }
}

}  // namespace linguine::render
With my sanity somewhat in tact, implementing the ProgressFeatureRenderer is somewhat trivial. I copied the ColoredFeatureRenderer, and modified the shaders like so:
#version 300 es

layout(location = 0)
in vec2 inPosition;

uniform mat4 viewProjectionMatrix;
uniform mat4 modelMatrix;

out float x;

void main() {
  gl_Position = viewProjectionMatrix * modelMatrix * vec4(inPosition, 0.0, 1.0);
  x = inPosition.x + 0.5;
}
#version 300 es

precision highp float;

uniform vec3 color;
uniform float progress;

in float x;

out vec4 outColor;

void main() {
  outColor = x < progress ? vec4(color, 1.0) : vec4(0.0, 0.0, 0.0, 1.0);
}
Naturally, I had to store the location of the new progress uniform with glGetUniformLocation(), and define the progress for each renderable using glUniform1f() before drawing it. Other than that, it was just a matter of adding the new feature renderer to the _features in the OpenGLRenderer.
The last render feature that we need to implement is the SelectableFeatureRenderer, but I have some other work I need to do before we get to that.
13.3 Input Management
Web browsers, much like mobile devices, are event-driven platforms. You can see this reflected in Emscripten's input APIs, which are entirely oriented around registering callbacks for various events (as opposed to polling for the current state of the input devices). I hope that it will be somewhat easy to get the input states that I need.
Just as a quick test, I've implemented the mousedown and mouseup handlers as described by the documentation:
WebInputManager::WebInputManager() {
  emscripten_set_mousedown_callback("canvas", nullptr, false, [](auto eventType, auto mouseEvent, auto userData) -> EM_BOOL {
    printf("down\n");
    return true;
  });

  emscripten_set_mouseup_callback("canvas", nullptr, false, [](auto eventType, auto mouseEvent, auto userData) -> EM_BOOL {
    printf("up\n");
    return true;
  });
}
Similar to the emscripten_set_main_loop() function, the provided function pointer can't be a member of an object. Lucky for us, the emscripten_set_*_callback() functions allow us to pass in an arbitrary pointer called userData. I'll use that to pass in the this pointer to the current instance of the WebInputManager, and call whatever member methods I please from the callback.
WebInputManager::WebInputManager() {
  emscripten_set_mousedown_callback("canvas", this, false, [](auto eventType, auto mouseEvent, auto userData) -> EM_BOOL {
    static_cast<WebInputManager*>(userData)->onMouseDown();
    return true;
  });

  emscripten_set_mouseup_callback("canvas", this, false, [](auto eventType, auto mouseEvent, auto userData) -> EM_BOOL {
    static_cast<WebInputManager*>(userData)->onMouseUp();
    return true;
  });
}

void WebInputManager::onMouseDown() {
  printf("down\n");
}

void WebInputManager::onMouseUp() {
  printf("up\n");
}
Simple enough. Now it's a matter of storing the events temporarily until the next call to pollEvents(). We've actually already done this in Scampi, so I'll use that implementation as a guide. I'll also go ahead and utilize the emscripten_set_mousemove_callback() function so that we can track movements between the down and up events.
pesto/src/platform/WebInputManager.cpp
#include "WebInputManager.h"

#include <emscripten/html5.h>

namespace linguine::pesto {

WebInputManager::WebInputManager(const Viewport& viewport) : _viewport(viewport) {
  emscripten_set_mousedown_callback("canvas", this, false, [](int eventType, const EmscriptenMouseEvent* mouseEvent, void* userData) -> EM_BOOL {
    static_cast<WebInputManager*>(userData)->onMouseDown(mouseEvent->button, mouseEvent->targetX, mouseEvent->targetY);
    return true;
  });

  emscripten_set_mouseup_callback("canvas", this, false, [](int eventType, const EmscriptenMouseEvent* mouseEvent, void* userData) -> EM_BOOL {
    static_cast<WebInputManager*>(userData)->onMouseUp(mouseEvent->button, mouseEvent->targetX, mouseEvent->targetY);
    return true;
  });

  emscripten_set_mousemove_callback("canvas", this, false, [](int eventType, const EmscriptenMouseEvent* mouseEvent, void* userData) -> EM_BOOL {
    static_cast<WebInputManager*>(userData)->onMouseMoved(mouseEvent->button, mouseEvent->targetX, mouseEvent->targetY);
    return true;
  });
}

void WebInputManager::pollEvents() {
  auto toRemove = std::vector<uint64_t>();

  for (auto& entry : _active) {
    switch (entry.second.state) {
    case TouchState::Down:
      entry.second.state = Hold;
      break;
    case TouchState::Up:
      toRemove.push_back(entry.first);
      break;
    default:
      break;
    }
  }

  for (const auto id : toRemove) {
    _active.erase(id);
  }

  for (const auto& entry : _pending) {
    if (entry.second.state == Hold
        && _active.find(entry.first) == _active.end()) {
      continue;
    }

    auto& active = _active[entry.first];
    active.x = entry.second.x;
    active.y = entry.second.y;
    active.state = entry.second.state;
  }

  _pending.clear();
}

void WebInputManager::onMouseDown(unsigned short button, long x, long y) {
  auto touch = Touch {
      static_cast<float>(x) / _viewport.getWidth(),
      1.0f - static_cast<float>(y) / _viewport.getHeight(),
      Down
  };
  _pending.insert({button, touch});
}

void WebInputManager::onMouseUp(unsigned short button, long x, long y) {
  auto touch = Touch {
      static_cast<float>(x) / _viewport.getWidth(),
      1.0f - static_cast<float>(y) / _viewport.getHeight(),
      Up
  };
  _pending.insert({button, touch});
}

void WebInputManager::onMouseMoved(unsigned short button, long x, long y) {
  auto touch = Touch {
      static_cast<float>(x) / _viewport.getWidth(),
      1.0f - static_cast<float>(y) / _viewport.getHeight(),
      Hold
  };
  _pending.insert({button, touch});
}

}  // namespace linguine::pesto
I added a temporary debug log to the GestureRecognitionSystem's onDownEvent() method just to make sure things are working as intended:
It works! Now for the trickier part: implementing the SelectableFeatureRenderer. This feature renderer will need to draw to a separate off-screen framebuffer, which can be sampled at runtime so that the GestureRecognitionSystem can determine which Selectable drawable is located at any arbitrary view position. I've actually done this in WebGL once before, on yet-another-project that went nowhere, in which I was attempting to build a website which could enable World of Warcraft players to customize their UI and export the result as a custom add-on for the game.
I'll be honest, it's very hard for me to remember all the steps required to make this work, and I always end up copying from some website or previous project. OpenGL's API feels very disconnected to me, and it's very easy to make calls to functions that you don't need, or call functions in the wrong order.
First, we need to create a texture and depth buffer, as well as the framebuffer that will contain them both:
glGenTextures(1, &_targetTexture);
glGenRenderbuffers(1, &_depthBuffer);
glGenFramebuffers(1, &_framebuffer);
Each time our renderer is resized, we'll need to reconstruct the backing storage for the texture and the depth buffer. Similar to the Metal version of the SelectableFeatureRenderer, we'll choose a texture format that's suitable for storing our 64-bit entity ID's at each pixel.
renderers/opengl/src/features/SelectableFeatureRenderer.cpp snippet
void SelectableFeatureRenderer::resize(uint16_t width, uint16_t height) {
  glBindFramebuffer(GL_FRAMEBUFFER, _framebuffer);

  glBindTexture(GL_TEXTURE_2D, _targetTexture);
  glTexParameteri(GL_TEXTURE_2D, GL_TEXTURE_MIN_FILTER, GL_LINEAR);
  glTexParameteri(GL_TEXTURE_2D, GL_TEXTURE_WRAP_S, GL_CLAMP_TO_EDGE);
  glTexParameteri(GL_TEXTURE_2D, GL_TEXTURE_WRAP_T, GL_CLAMP_TO_EDGE);
  glTexImage2D(GL_TEXTURE_2D, 0, GL_RGBA16UI, width, height, 0, GL_RGBA_INTEGER, GL_UNSIGNED_SHORT, nullptr);
  glFramebufferTexture2D(GL_FRAMEBUFFER, GL_COLOR_ATTACHMENT0, GL_TEXTURE_2D, _targetTexture, 0);
  glBindTexture(GL_TEXTURE_2D, 0);

  glBindRenderbuffer(GL_RENDERBUFFER, _depthBuffer);
  glRenderbufferStorage(GL_RENDERBUFFER, GL_DEPTH_COMPONENT16, width, height);
  glFramebufferRenderbuffer(GL_FRAMEBUFFER, GL_DEPTH_ATTACHMENT, GL_RENDERBUFFER, _depthBuffer);
  glBindRenderbuffer(GL_RENDERBUFFER, 0);

  glBindFramebuffer(GL_FRAMEBUFFER, 0);
}
We'll also need a new shader program suitable for drawing the geometry to our new framebuffer.
#version 300 es

layout(location = 0)
in vec2 inPosition;

uniform mat4 viewProjectionMatrix;
uniform mat4 modelMatrix;

void main() {
  gl_Position = viewProjectionMatrix * modelMatrix * vec4(inPosition, 0.0, 1.0);
}
#version 300 es

precision highp int;

uniform uvec4 id;

out uvec4 fragColor;

void main() {
  fragColor = id;
}
The magic to utilizing our new framebuffer for our draw calls is simply calling glBindFramebuffer(GL_FRAMEBUFFER, _framebuffer) at the beginning of our draw() method - we'll just need to remember to unbind it at the end by calling glBindFramebuffer(GL_FRAMEBUFFER, 0). You've seen this same draw method over and over again, so I'll just point out the differences.
Similar to the Metal implementation, we check the current camera's ID, and only clear the image if it's 0. Unfortunately, OpenGL's glClearColor() / glClear() functions only work with framebuffers that store their contents as floating-point values, and you have to use a different call in order to clear framebuffers that deviate from the norm.
if (camera.getId() == 0) {
  auto clearColor = glm::uvec4(UINT16_MAX, UINT16_MAX, UINT16_MAX, UINT16_MAX);
  glClearBufferuiv(GL_COLOR, 0, glm::value_ptr(clearColor));
  glClear(GL_DEPTH_BUFFER_BIT);
}
I also need to organize my data in a suitable format so that I can pass it into the fragment shader's uniform:
auto data = glm::uvec4(
    feature.entityId & 0xFFFF,
    (feature.entityId >> 16) & 0xFFFF,
    (feature.entityId >> 32) & 0xFFFF,
    (feature.entityId >> 48) & 0xFFFF
);

glUniform4uiv(_idLocation, 1, glm::value_ptr(data));
Now all I need to do is whip up a method capable of reading pixel data at an arbitrary location, and convert it back into an entity ID.
renderers/opengl/src/features/SelectableFeatureRenderer.cpp snippet
std::optional<uint64_t> SelectableFeatureRenderer::getEntityIdAt(float x, float y) const {
  glBindFramebuffer(GL_FRAMEBUFFER, _framebuffer);

  glm::uvec4 data;
  glReadPixels(x, y, 1, 1, GL_RGBA_INTEGER, GL_UNSIGNED_SHORT, glm::value_ptr(data));
  glBindFramebuffer(GL_FRAMEBUFFER, 0);

  auto id = static_cast<uint64_t>(data.x)
            + (static_cast<uint64_t>(data.y) << 16)
            + (static_cast<uint64_t>(data.z) << 32)
            + (static_cast<uint64_t>(data.w) << 48);

  if (id != UINT64_MAX) {
    return id;
  }

  return {};
}
Now, in the OpenGLRenderer, I can just forward that call to the SelectableFeatureRenderer, just like I do in the Metal version.
renderers/opengl/src/OpenGLRenderer.cpp snippet
std::optional<uint64_t> OpenGLRendererImpl::getEntityIdAt(float x, float y) const {
  return _selectableFeatureRenderer->getEntityIdAt(x, y);
}
It took me a lot of iteration to get to this point. Every line of OpenGL code feels like a wrong turn that I don't quite understand until all of the warning messages finally subside. The issue that took me the longest to determine was that I was trying to go ahead and bind the texture and depth buffer to the framebuffer in the constructor (prior to the resize() call) using glFramebufferTexture2D() and glFramebufferRenderbuffer(), and simply hope that resizing them via glTexImage2D() and glRenderbufferStorage() would be sufficient. Unfortunately this is not the case, and you must bind the framebuffer and call glFramebufferTexture2D() and glFramebufferRenderbuffer() on each resize().
Even now, with no errors or warning messages, this code doesn't work. I've toyed around with many different texture formats and ways of organizing the data, but everything I do just results in the getEntityIdAt() returning empty.
Finally, after hours, I realized my mistake. glReadPixels() expects its x and y parameters to be the number of pixels from the origin, not normalized floating-point numbers representing the position! OpenGL differs from Metal in its texture coordinate space. While the Metal version has to "flip" the Y-axis value, I don't have to do any such logic in OpenGL.
glReadPixels(x * _width, y * _height, 1, 1, GL_RGBA_INTEGER, GL_UNSIGNED_SHORT, glm::value_ptr(data));
Finally, it works!
Throughout this process, I've been debugging in different browsers, trying to make sense of things. I've noticed that Firefox gives very different WebGL-related warnings than Google Chrome, and they are picky about different things. In fact, this code still doesn't quite work in Firefox:
WebGL warning: readPixels: Format and type RGBA_INTEGER/UNSIGNED_SHORT incompatible with this RGBA16UI attachment. This framebuffer requires either RGBA_INTEGER/UNSIGNED_INT or getParameter(IMPLEMENTATION_COLOR_READ_FORMAT/_TYPE) RGBA_INTEGER/UNSIGNED_INT.
Sure enough, changing the glReadPixels() "type" parameter to GL_UNSIGNED_INT instead of GL_UNSIGNED_SHORT makes it work just fine in both browsers.
I'm sufficiently sick of this, so let's move on.
13.4 Audio
We really haven't focused on utilizing audio during the prototyping phase. Frankly, it doesn't contribute to the core gameplay, though you could argue that it certainly contributes to the game feel. I could easily skip this step for the time-being, but for the sake of completion, I'll go ahead and give the web platform feature parity with the other platforms supported by the engine.
I've been reading up on the audio solutions supported by Emscripten. It appears that the prefered way to do so is by using SDL - which happens to also be the preferred way to handle inputs and general "window" management. I've avoided using SDL so far, why start now?
Emscripten also supports OpenAL and their own Wasm Audio Worklets API. I decided not to use OpenAL on macOS and iOS because it's deprecated for Apple's platforms, but that isn't an issue here. OpenAL also appears to be drastically easier to utilize than Wasm Audio Worklets.
You know the routine: we'll create an openal subdirectory within the audio/ directory, create its CMakeLists.txt file and make it link to the OpenAL library, add the new library to the root CMakeLists.txt file, and link to it from Pesto. I'll go ahead and stub out a new OpenALAudioManager class, delete the old stubbed WebAudioManager class, and replace the references in Pesto's main.cpp. All of that compiles and runs just fine, so now we can dive into the actual implementation. There is one big problem though: I've never used OpenAL! So I'll just go read up a bit first.
OpenAL appears to rely on populating its "buffer" objects using data that is already in-memory, which means it's up to us to load the audio data from whichever files it might reside. To complicate things further, we're not necessarily loading files directly from the filesystem, like we would be in a desktop or mobile application. Since we're operating within a web browser, we'll either need a way to load the audio data from a URL, or some other mechanism to package the data directly with our compiled application.
Emscripten appears to support a variety of solutions. One option would be to utilize the emscripten_async_wget_data() function to fetch all the files from their respective URLs on application startup. Another option is to utilize Emscripten's virtual file system, which is populated by packaging the files. We could even combine the two options by using the emscripten_async_wget() function to download files to the virtual file system.
Packaging the files into a single bundle can be advantageous if you need all the files before the application can function. Video games often load all of the files required for a particular "level" behind a loading screen before allowing the player to actually interact with that level. Bundling files like this would obviously not be so great for games that are capable of dynamically loading content as the player traverses through the world.
Dynamically loading files from URLs is a much more dynamic approach, but requires a bit more hand-holding - and I'm not sure I care so much about it at this stage. Our AudioEngine-based audio manager contains its own file loading abstraction, which requires each application (Alfredo and Scampi) to provide platform-specific implementations in order for it to function.
I think for now, I'll write the OpenAL-based audio manager with the same type of file loading abstraction so that Pesto is free to load the files in any way, as long as it can pass the file data to the audio manager - be it from the virtual file system or fetching from a URL - then everything should work.
I've started off by using the default "device" and creating a context using that device within the OpenALAudioManager constructor. This is a little weird because OpenGL contexts are managed in a very platform-specific way, but that doesn't seem to be the case with OpenAL. I'll go ahead and add the logic to clean up the context and device in the destructor.
Next I'd like to load the audio data into OpenAL buffers, but I've hit my first snag (well that didn't take long). I've created a new OpenALFileLoader interface, and added a constructor parameter so that the application can provide a suitable implementation. The interface contains a single getAudioDataForEffect(EffectType effectType) method which returns a std::vector<std::byte>. Assuming the contents of the file are successfully returned, I thought I could just pass those contents directly to OpenAL's alBufferData() function, but it appears I also need to know some other information about the data, such as the number of channels, the sample rate, and the number of bits per sample. The WAV format encodes this data within the files, but should I be writing a WAV file decoder? Should I be supporting other file formats as well? It's interesting that Apple's AudioEngine API did this for me.
I happen to know that both of the audio files that I've been using are WAV files with 2 channels, a 44.1kHz sample rate, and 24 bits per sample. Would it be such a bad thing to just hardcode those values for now? Unfortunately, OpenAL doesn't appear to support files with 24 bits per sample (only 8 or 16). There is a library called the OpenAL Utility Toolkit (ALUT) which streamlines the process of audio file loading, but I'm not sure if it adds any support for 24-bit WAV files.
There's a much simpler solution to this problem though: just convert my existing audio files to a 16-bit format. I can hardcode the format and frequency values for buffer creation, and define a new "rule" that our engine only supports audio files that fit those parameters.
I Google'd "online audio converter", and used the website convertio.co to do the conversions. As a quick test, I switched the engine back to using the old TestScene and made sure that the newly formatted audio files worked fine in Alfredo (which they do).
Assuming these files are able to be played by OpenAL, I still need a way to load them prior to playback, which means I need to implement the OpenALFileLoader in Pesto. I created a WebOpenALFileLoader class, and implemented it using a very standard C++ file loading technique.
pesto/src/platform/WebOpenALFileLoader.cpp
#include "WebOpenALFileLoader.h"

#include <fstream>
#include <string>

namespace linguine::pesto {

std::vector<std::byte> WebOpenALFileLoader::getAudioDataForEffect(EffectType effectType) const {
  std::string filename;

  switch (effectType) {
  case Pop:
    filename = "/assets/audio/Balloon Pop 1.wav";
    break;
  case Select:
    filename = "/assets/audio/Select 1.wav";
    break;
  }

  auto file = std::ifstream(filename, std::ios::binary | std::ios::ate);
  auto size = file.tellg();

  auto result = std::vector<std::byte>(size);

  file.seekg(0, std::ios::beg);
  file.read(reinterpret_cast<char*>(result.data()), size);

  return result;
}

}  // namespace linguine::pesto
Notice that the file paths that I've defined are from the root (/) of the filesystem. That's because Emscripten's default virtual filesystem maps its files to the root path. But how do we get our files into that filesystem? In the documentation for packaging our files, it tells us to use either the --preload-file or --embed-file compiler options. I've chosen to use the preloading option because the documentation states that it's more effecient than its embedding counterpart. Preloading our assets should just be a matter of adding --preload-file ${CMAKE_SOURCE_DIR}/assets to our compiler flags in Pesto's `CMakeLists. In order to test all of this out, I'm just going to specify a single buffer in our audio manager, containing our "pop" sound effect, and attempt to play that effect regardless of which effect was requested.
audio/openal/src/OpenALAudioManager.cpp
#include "OpenALAudioManager.h"

#include <AL/al.h>

namespace linguine::audio {

OpenALAudioManager::OpenALAudioManager(std::unique_ptr<OpenALFileLoader> fileLoader)
    : _fileLoader(std::move(fileLoader)) {
  _device = alcOpenDevice(nullptr);
  _context = alcCreateContext(_device, nullptr);
  alcMakeContextCurrent(_context);

  alGenSources(1, &_source);

  alSourcef(_source, AL_PITCH, 1.0f);
  alSourcef(_source, AL_GAIN, 1.0f);
  alSource3f(_source, AL_POSITION, 0.0f, 0.0f, 0.0f);
  alSource3f(_source, AL_VELOCITY, 0.0f, 0.0f, 0.0f);
  alSourcei(_source, AL_LOOPING, AL_FALSE);

  alGenBuffers(1, &_buffer);

  auto data = _fileLoader->getAudioDataForEffect(EffectType::Pop);
  alBufferData(_buffer, AL_FORMAT_STEREO16, data.data(), data.size(), 44100);
}

OpenALAudioManager::~OpenALAudioManager() {
  alDeleteBuffers(1, &_buffer);

  alDeleteSources(1, &_source);

  alcMakeContextCurrent(nullptr);
  alcDestroyContext(_context);
  alcCloseDevice(_device);
}

void OpenALAudioManager::play(EffectType effectType) {
  alSourcei(_source, AL_BUFFER, _buffer);
  alSourcePlay(_source);
}

}  // namespace linguine::audio
Unfortunately, running the application like this throws an exception that looks like the file isn't found. What happens when we specify that specific file in our compiler options, rather than the entire assets folder? After initially fumbling with escaping the spaces in the file path, this is what I got:
Error: Embedding "<omitted>/assets/audio/Balloon Pop 1.wav" which is not contained within the current directory "<omitted>/cmake-build-debug-web". This is invalid since the current directory becomes the root that the generated code will see. To include files outside of the current working directoty you can use the `--preload-file srcpath@dstpath` syntax to explicitly specify the target location.
That is a surprisingly helpful error. If I change the syntax to utilize the @ and a destination for that file, then it works! Obviously I want to include all of the assets rather than that particular file, so I'll change the paths appropriately.
pesto/CMakeLists.txt snippet
set_target_properties(pesto PROPERTIES LINK_FLAGS "-sMIN_WEBGL_VERSION=2 -sMAX_WEBGL_VERSION=2 -sALLOW_MEMORY_GROWTH --preload-file ${CMAKE_SOURCE_DIR}/assets@/assets")
Now it's just a matter of loading all of the buffers on startup, and selecting the correct one on play().
audio/openal/src/OpenALAudioManager.cpp snippet
OpenALAudioManager::OpenALAudioManager(std::unique_ptr<OpenALFileLoader> fileLoader)
    : _fileLoader(std::move(fileLoader)) {
  ...

  loadBuffer(EffectType::Pop);
  loadBuffer(EffectType::Select);
}

OpenALAudioManager::~OpenALAudioManager() {
  for (const auto& buffer : _buffers) {
    alDeleteBuffers(1, &buffer.second);
  }

  ...
}

void OpenALAudioManager::play(EffectType effectType) {
  alSourcei(_source, AL_BUFFER, _buffers[effectType]);
  alSourcePlay(_source);
}

void OpenALAudioManager::loadBuffer(EffectType effectType) {
  ALuint buffer;
  alGenBuffers(1, &buffer);

  auto data = _fileLoader->getAudioDataForEffect(effectType);
  alBufferData(buffer, AL_FORMAT_STEREO16, data.data(), data.size(), 44100);

  _buffers[effectType] = buffer;
}
13.5 sRGB
I've put this off until I got all of the core engine features working, but it really has been bothering me quite a bit. I've done a bit of research on the topic. OpenGL's desktop distribution has a GL_FRAMEBUFFER_SRGB feature that can be enabled, but OpenGL ES (and therefore WebGL) has no such option. I've found a few mentions of some extensions that can be enabled, but there's no guarantee that any given browser support that particular extension until it becomes part of the core API.
What we can do, however, is create a new framebuffer that is backed by its own sRGB texture, render all of our geometry to that new framebuffer, and then "blit" the contents of it to the automatically created backbuffer. We know what it takes to manage our own framebuffer, because we've already done it for our SelectableFeatureRenderer.
In order to resize the texture backing the new framebuffer, I had to make the resize() method of the renderer virtual, and override it in our OpenGLRendererImpl class. Other than that, it was a matter of binding the correct framebuffer in the correct spots. Since we're using a new depth buffer for this framebuffer, I've additionally disabled the depth attribute in our EmscriptenWebGLContextAttributes in main.cpp.
renderers/opengl/src/OpenGLRenderer.cpp snippet
void OpenGLRendererImpl::resize(uint16_t width, uint16_t height) {
  OpenGLRenderer::resize(width, height);

  glBindTexture(GL_TEXTURE_2D, _targetTexture);
  glTexParameteri(GL_TEXTURE_2D, GL_TEXTURE_MIN_FILTER, GL_LINEAR);
  glTexParameteri(GL_TEXTURE_2D, GL_TEXTURE_WRAP_S, GL_CLAMP_TO_EDGE);
  glTexParameteri(GL_TEXTURE_2D, GL_TEXTURE_WRAP_T, GL_CLAMP_TO_EDGE);
  glTexImage2D(GL_TEXTURE_2D, 0, GL_SRGB8_ALPHA8, width, height, 0, GL_RGBA, GL_UNSIGNED_BYTE, nullptr);
  glBindTexture(GL_TEXTURE_2D, 0);

  glBindRenderbuffer(GL_RENDERBUFFER, _depthBuffer);
  glRenderbufferStorage(GL_RENDERBUFFER, GL_DEPTH_COMPONENT16, width, height);
  glBindRenderbuffer(GL_RENDERBUFFER, 0);

  glBindFramebuffer(GL_FRAMEBUFFER, _framebuffer);
  glFramebufferTexture2D(GL_FRAMEBUFFER, GL_COLOR_ATTACHMENT0, GL_TEXTURE_2D, _targetTexture, 0);
  glFramebufferRenderbuffer(GL_FRAMEBUFFER, GL_DEPTH_ATTACHMENT, GL_RENDERBUFFER, _depthBuffer);
  glBindFramebuffer(GL_FRAMEBUFFER, 0);
}

void OpenGLRendererImpl::draw() {
  for (const auto& camera : getCameras()) {
    glBindFramebuffer(GL_FRAMEBUFFER, _framebuffer);

    if (camera->clearColor) {
      glClearColor(camera->clearColor->r, camera->clearColor->g, camera->clearColor->b, 1.0f);
      glClear(GL_COLOR_BUFFER_BIT);
    }

    glClearDepthf(1.0f);
    glClear(GL_DEPTH_BUFFER_BIT);

    for (const auto& feature : getFeatures()) {
      glBindFramebuffer(GL_FRAMEBUFFER, _framebuffer);
      feature->draw(*camera);
    }
  }

  glBindFramebuffer(GL_READ_FRAMEBUFFER, _framebuffer);
  glBindFramebuffer(GL_DRAW_FRAMEBUFFER, 0);
  glBlitFramebuffer(0, 0, getViewport().getWidth(), getViewport().getHeight(),
                    0, 0, getViewport().getWidth(), getViewport().getHeight(),
                    GL_COLOR_BUFFER_BIT, GL_LINEAR);
  glBindFramebuffer(GL_READ_FRAMEBUFFER, 0);
}
Much to my surprise, however, the resulting image is no different from rendering directly to the default framebuffer.
I've been working on this somewhat sporadically as I've been visiting my dad over the last week. I've pondered a lot about the topic, and I occasionally even Google different combinations of "WebGL", "OpenGL ES 3.0", and "sRGB". The information on this topic is somewhat incohesive. This StackOverflow suggests that what I've done here should "just work". Random threads and mailing lists over the last decade suggest that, while sRGB is the standard for the web, it's still very much up-in-the-air for WebGL.
While we may not get this color grading for "free", there is another solution: post-processing. Rather than blitting our image between framebuffers hoping for OpenGL to do the color conversion for us, we can create a shader program that samples from our internal framebuffer and does the color conversion before writing the result to the default framebuffer.
I created a new postprocessing/ directory, and made a GammaCorrection class within it. The structure of this class looks very similar to our feature renderers, with the shader program being created in the constructor, and a draw() method to perform the rendering logic. Unlike our feature renderers, this class does not care about cameras or renderable objects, so I'm keeping it separate.
As I was fumbling with writing the shaders, I noticed a bug in all of our feature renderers: if the fragment shader fails to compile, then I erroneously try to grab the error log from the vertex shader. I fixed this in all the feature renderers and continued about my business. Using this and this as guides, here are the shaders I whipped up.
#version 300 es

layout(location = 0)
in vec2 inPosition;

out vec2 uv;

void main() {
  gl_Position = vec4(inPosition, 0.0, 1.0);
  uv = (inPosition + 1.0) / 2.0;
}
#version 300 es

precision highp float;

in vec2 uv;

uniform sampler2D source;

out vec4 outColor;

void main() {
  vec4 value = texture(source, uv);
  outColor = vec4(pow(value.rgb, vec3(1.0 / 2.2)), value.a);
}
The formula I've used is actually just an approximation of sRGB nonlinearization, but doing it the "right" way is a rather expensive operation.
In order for this to work, I need to render a quad over the entire screen. Our existing QuadMesh class contains vertices that only extend halfway to the "edges" of the screen (when rendered without transformation matrics), so I created a new ScreenMesh class to cover the post-processing case. It's identical to the QuadMesh, except that all of the 0.5's have been replaced with 1.0's. I won't be exposing this mesh to the rest of the engine by creating a new MeshType enum value - I just need something to render a quad over the whole screen from within the renderer.
I added a constructor parameter to the GammaCorrection class so that I can pass in the handle for the internal framebuffer texture. This handle will be bound to the sampler in the shader, allowing us to grab pixel data from it based on the uv value. Because this quad is being rendered over the entire screen, that means every pixel of the texture will be sampled by this shader. Not the most performant option, which is why it would have been nice for WebGL to do this for me.
renderers/opengl/src/postprocessing/GammaCorrection.cpp snippet
void GammaCorrection::draw() {
  glUseProgram(_shaderProgram);

  glActiveTexture(GL_TEXTURE0);
  glBindTexture(GL_TEXTURE_2D, _sourceTexture);
  glUniform1i(_sourceLocation, 0);

  _screenMesh.bind();
  _screenMesh.draw();
  _screenMesh.unbind();

  glUseProgram(0);
}
renderers/opengl/src/OpenGLRenderer.cpp snippet
void OpenGLRendererImpl::draw() {
  ...

  glBindFramebuffer(GL_FRAMEBUFFER, 0);
  _gammaCorrection->draw();
}
Man I hate this API.
It kind of works. Most of the colors have been converted properly, but the background still seems off - and it occasionally flickers to the correct shade and back again. I have no idea why it would be doing that. I guess since I'm doing the gamma correction manually now, I can switch the internal format of the framebuffer's texture to RGBA8 instead of SRGBA8_ALPHA8.
Wow. After changing the texture format, it stopped flickering and everything looks correct. I thought I was going crazy so I reverted the change, and sure enough, it started flickering again. After a series of undos/redos, I'm convinced that this actually resolves the issue. Maybe WebGL was trying to do the sRGB conversion automatically and just... sucks at it?
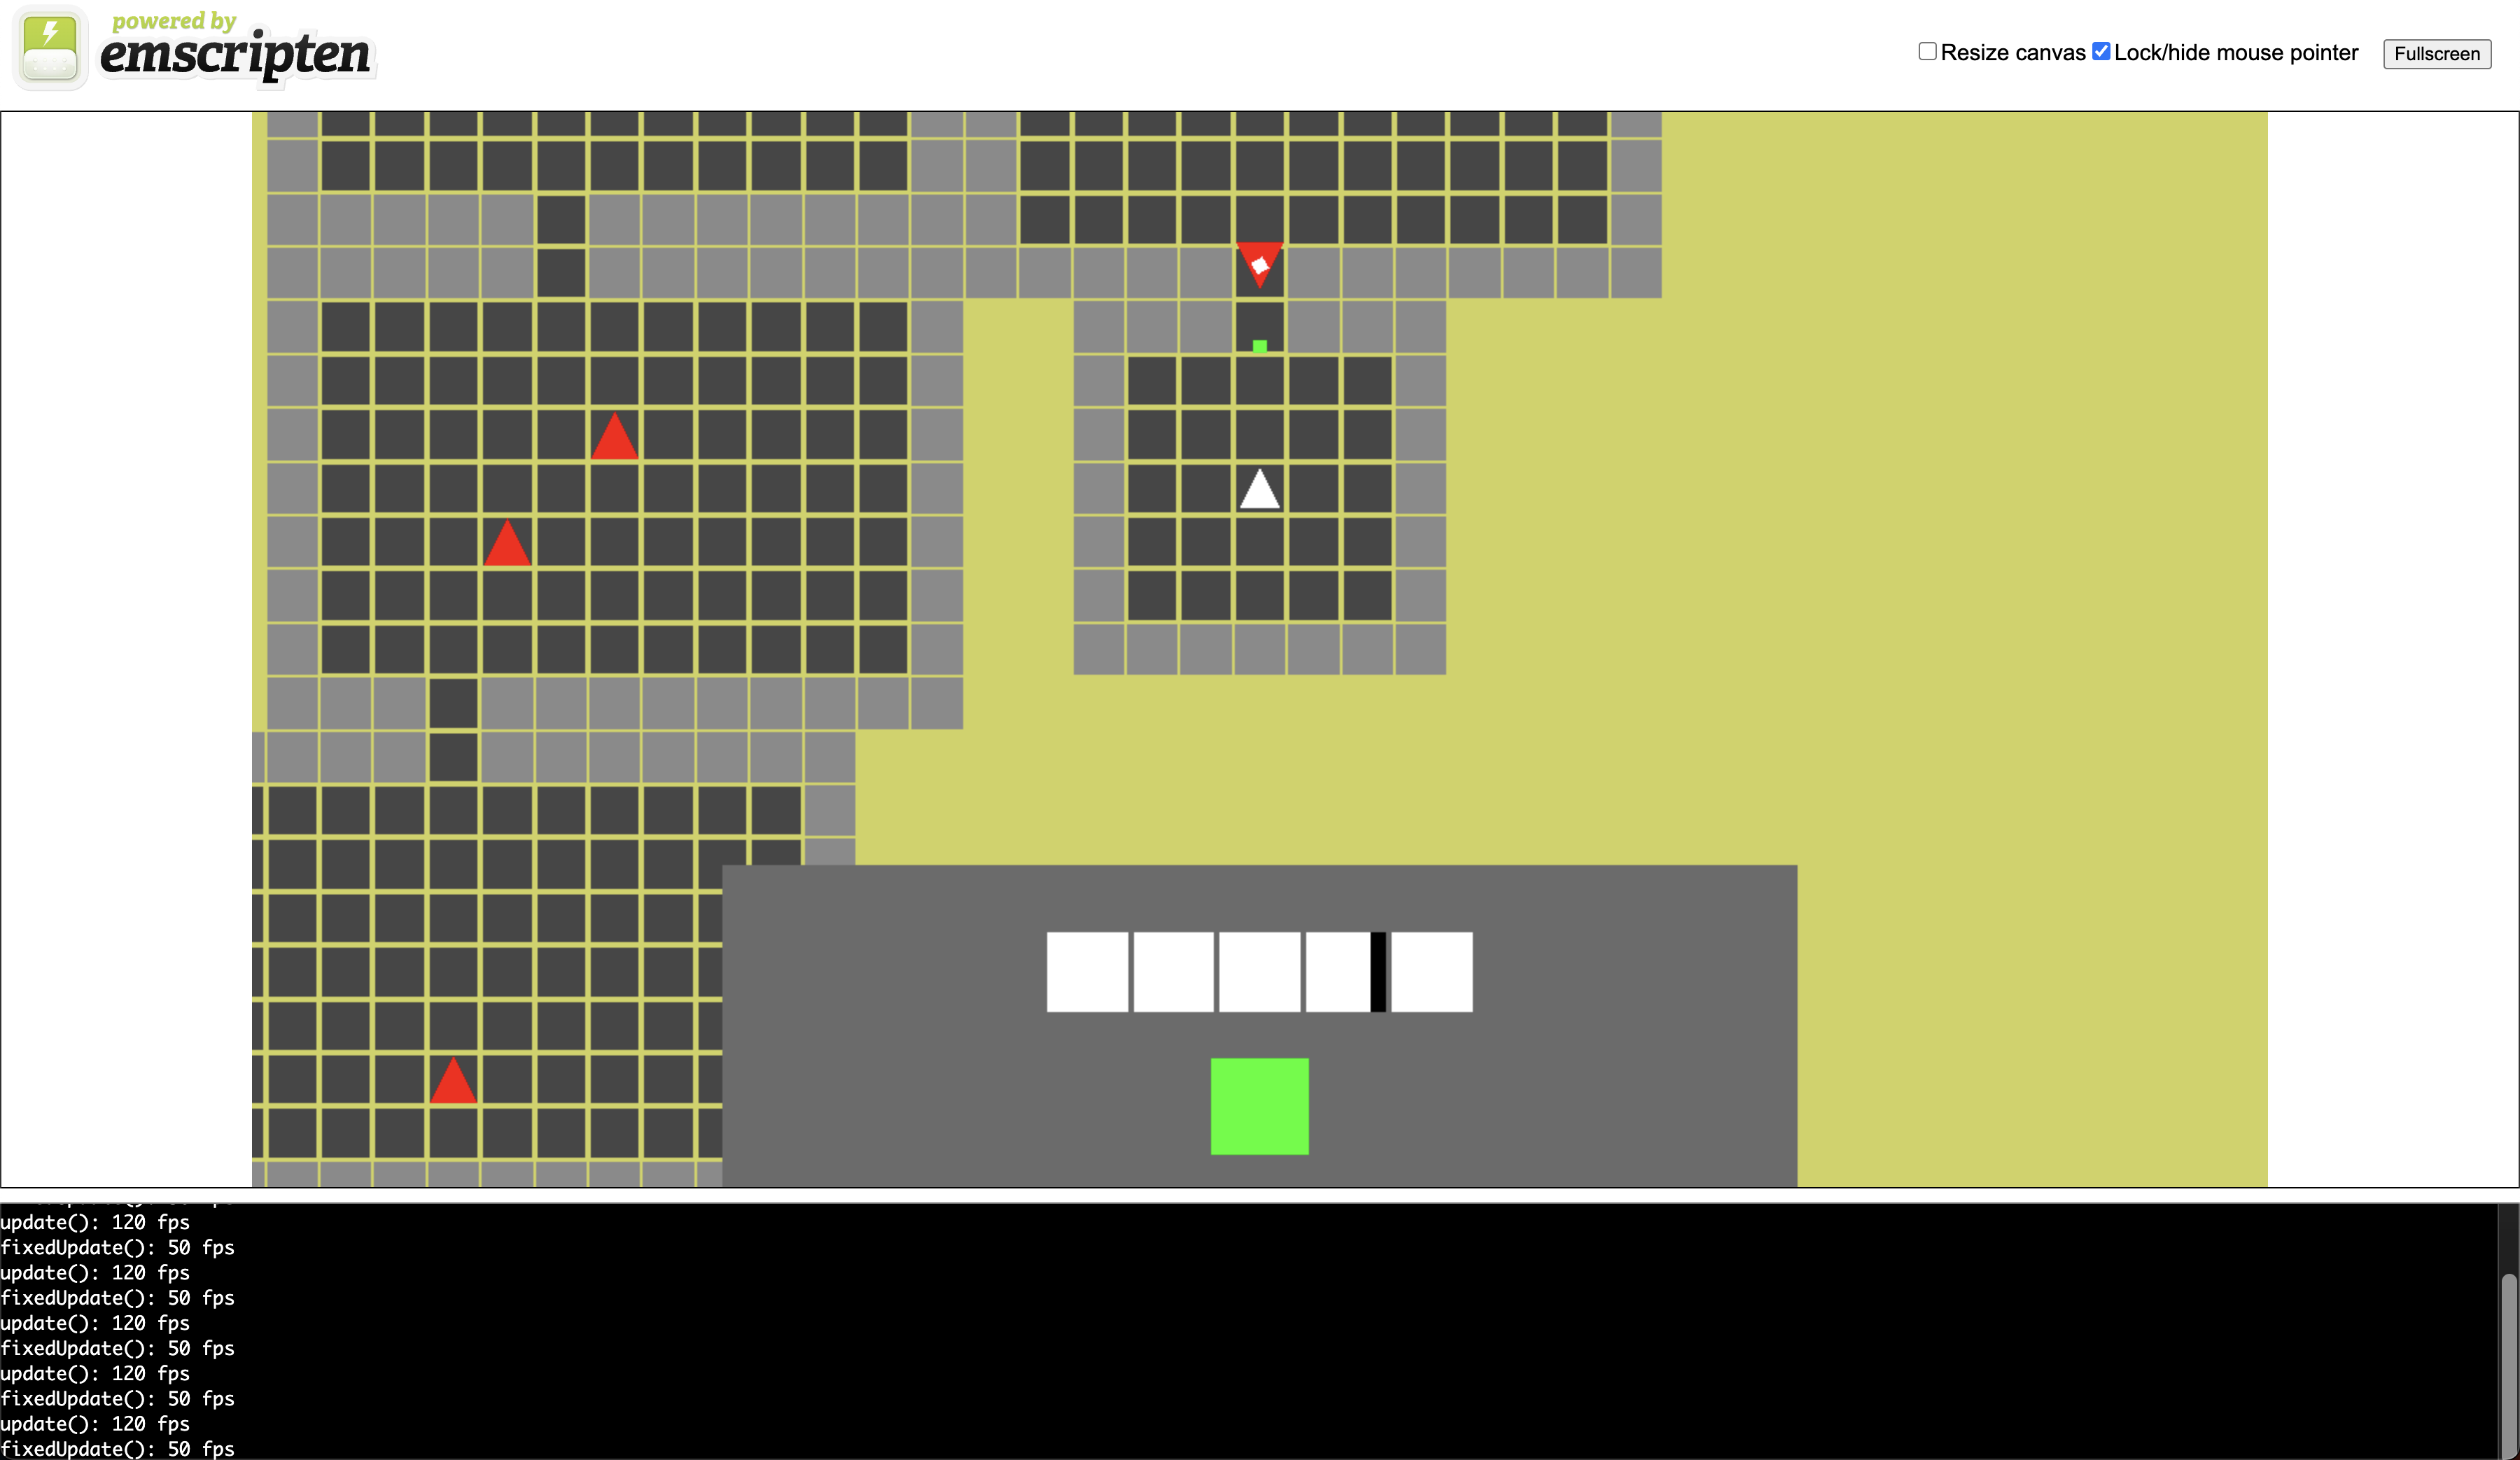
13.6 Publishing the Game
It's pretty cool to see the game completely functional from a web browser. Even cooler to me is that we managed to port the game to a new platform with no substantial changes to the core engine or gameplay code. Many programming languages and frameworks have promised the dream of a "shared" codebase for all platforms, but we managed to achieve the same feat with good old C++.
Still, I'm not satisfied until the latest version of the game is playable from my web site. Currently, playing it from the web browser still requires each person to pull down the latest version of the code and actually compile it themselves. That would be a ridiculous thing to ask of any player.
Assuming I'm going to continue to use GitHub Actions for this purpose, the first thing I need to do is configure an Action to perform a "Release" build for Pesto using CMake and the Emscripten SDK. I came across this project which made it rather easy to utilize the Emscripten SDK.
name: ci

on:
  push:
    branches:
      - "main"

env:
  BUILD_TYPE: Release
  EM_CACHE_FOLDER: emsdk-cache
  EM_VERSION: 3.1.42

jobs:
  build:
    runs-on: ubuntu-latest

    steps:
      - uses: actions/checkout@v3

      - id: cache-system-libraries
        uses: actions/cache@v3
        with:
          path: ${{env.EM_CACHE_FOLDER}}
          key: ${{env.EM_VERSION}}-${{ runner.os }}
      - uses: mymindstorm/setup-emsdk@v11
        with:
          version: ${{env.EM_VERSION}}
          actions-cache-folder: ${{env.EM_CACHE_FOLDER}}

      - name: Configure CMake
        run: emcmake cmake -B build -DCMAKE_BUILD_TYPE=${{env.BUILD_TYPE}}

      - name: Build
        run: cmake --build build --target pesto -j2
That was easy! Now for the more complicated part: I want to use GitHub Pages to host every version of the game by the git hash, so that I can dynamically embed any revision of the game directly into this web site. For the web site itself, I just followed the instructions from MkDocs, which states that their command encapsulates the usage of a tool called ghp-import.
After adding the contents: write permission to the configuration, I attempted to utilize the version of ghp-import that was available through Ubuntu's repositories. Apparently that version does not yet include support for the --prefix option, which allows you to ignore all the contents of the destination branch, other than files that reside within a defined prefix. I plan to use this option to organize the gh-pages branch into directories named after commit hashes of the main branch.
I changed the installation of the tool from apt to pip, and initially it seemed to work. However, after making another commit, I found that the tool does not cleanly handle separate directories within the destination branch like I had hoped.
I wound up completely abandoning ghp-import, in favor of manually handling the required git commands myself. It really isn't that complicated, though I did spend a bit of time fumbling around with setting environment variables from within the GitHub Action, before realizing that GitHub provides the current git hash as a default environment variable named GITHUB_SHA.
In the end, the only additional changes I made to the above configuration were the write permissions, as well as a couple of extra steps:
- name: Prepare
  run: mkdir $GITHUB_SHA && mv build/pesto/pesto.* $GITHUB_SHA/
- name: Push
  run: git fetch && git checkout gh-pages && git add $GITHUB_SHA/ && git config user.email "justin@justindriggers.com" && git config user.name "Justin Driggers" && git commit -m "$(git log -1 --pretty=%B)" && git push
I configured the Linguine GitHub repository and my domain registrar to use https://linguine.kravick.dev, so now I can access every successfully-building revision of the game at https://linguine.kravick.dev/<commit_hash>/pesto.html - for instance, the current revision (as of this writing) can be found at https://linguine.kravick.dev/8ad06a11268e0dc83231046cd30348da172a4b4b/pesto.html.
However, I'd like to be able to embed the game directly, so that users don't have to navigate away from the page. The default generated Emscripten HTML page is also pretty ugly, so it would be a much better experience if the game fit into my own theme.
That HTML page is nice to have, since it provides useful on-screen logging, but I should be able to create a <canvas> element and include the generated JS file from whichever HTML page I want. Using mkdocs serve, I'm able to test this functionality locally before I push the contents of this chapter.
<canvas id="canvas" width="720" height="384"></canvas>
<script async src="https://linguine.kravick.dev/8ad06a11268e0dc83231046cd30348da172a4b4b/pesto.js"></script>
The first thing I notice is that it's trying to load the pesto.data file (which contains our sound effects) from the local domain rather than the script's domain. This is somewhat unexpected, but according to Emscripten's documentation, I can override that behavior by including a little bit of JavaScript before I try to run the external JS file.
<script>
var Module = {
  'locateFile': function(path, prefix) {
    return "https://linguine.kravick.dev/8ad06a11268e0dc83231046cd30348da172a4b4b/" + path;
  }
};
</script>
The next thing I notice is that the canvas dimensions are not respected. The problem is pretty obvious: I explicitly call emscripten_set_canvas_element_size("canvas", 1440, 768) in Pesto's main.cpp. If I get rid of that line, then the generated HTML (which doesn't explicitly define dimensions for its canvas element) will have a tiny 300x150 canvas, because that's the default size.
I'm going to use a little hack here. I'll call emscripten_get_canvas_element_size(), and if it returns the default canvas size of 300x150, then I'll automatically resize it to 1440x768. This will, of course, be unexpected for anyone trying to explicitly size a canvas to 300x150, but I'm the only person who cares right now anyway.
After that change, my new commit hash is ebabbbfc08493ea25a6847c857f4100166338392, so I should be able to try it again with a slightly different URL (after waiting for my GitHub Action to finish running on the new commit).
<canvas id="canvas" width="720" height="384"></canvas>
<script>
var Module = {
  'locateFile': function(path, prefix) {
    return "https://linguine.kravick.dev/ebabbbfc08493ea25a6847c857f4100166338392/" + path;
  }
};
</script>
<script async src="https://linguine.kravick.dev/ebabbbfc08493ea25a6847c857f4100166338392/pesto.js"></script>
It totally works! The canvas is a little smaller than the calculated width of the content, so I'll center it by adding style="display:block; margin:0 auto 0 auto" to it. I'll also add oncontextmenu="event.preventDefault()" to prevent the right-click menu from popping up inside of it, and tabindex="-1" to prevent any Tab-key related behavior - these options are set by default in the generated HTML page, but I need to set them explicitly elsewhere.
The ProceduralPrototypeScene is a bit buggy, which normally I wouldn't mind. However, in its current state, it can get stuck in an infinite loop and lock up the user's browser. The entire point of prototyping is to avoid fixing bugs like that (since the design and behavior are likely to change anyway), but it's hard to justify leaving it like that on a live web page. If you're interested in checking it out anyway, you are free to do so!
For now, I'll embed the TestScene with 1,000 objects. This scene demonstrates most of the capabilities of the engine: rendering, audio, input management, dynamically composable entities, etc.
Click on a "rising" entity to reverse its direction. Successfully doing so will play a sound effect. Long-click on any entity to destroy it, which will also play a "pop" noise. I am aware that the inputs don't work on touch devices - I think it would be simple to fix, but I'll save that for another day.
Wrapping it Up
I really enjoyed this chapter. I was able to dabble in a myriad of things that I've never had the chance to use before, and everything came together in the end.
This commit is where I'm currently at. I just made a small fix to the GitHub Actions configuration so that it correctly copies the commit message from the main branch to the gh-pages branch. I'd encourage you to take a look at that branch as well, just to see how I've organized it. GitHub Pages is not intended to host this type of project, and is certainly not intended to host historical revisions, but I'll keep using it until I have a reason to move off of it.
With these chapters now freely available to the public, along with the ability to embed the game directly into the pages, you could say that I've successfully "released" them both, and therefore I have satisfied the requirements I set for myself in the introduction! Do not fret, I won't be stopping any time soon.